Conservation Journal
Autumn 2003 Issue 45
Decision making: Technical information revealed
Whilst many of us would associate Augustus W.N. Pugin with the Gothic architecture of the Houses of Parliament we should not forget that he was also a prolific designer. His attention to detail was underlined by an obsession that ornament should 'embellish rather than disguise'1 and his scholastic reinterpretation of the theories of geometric plant forms was largely due to the sixteenth century botanical volume, Eicores Plantarum (1590) by Jacobus Theodorus. Examples of his Floriated Ornamentation (1849, 1875) are largely portrayed in the stained glass, tiles, ecclesiastical furnishings and domestic interior designs depicted in working drawings found in the Design Section of the V&A’s Word and Image Department.2 Twenty-four of these designs for wallpaper and textile prints required immediate conservation to allow for public access and to render previous hidden information visible for future study.
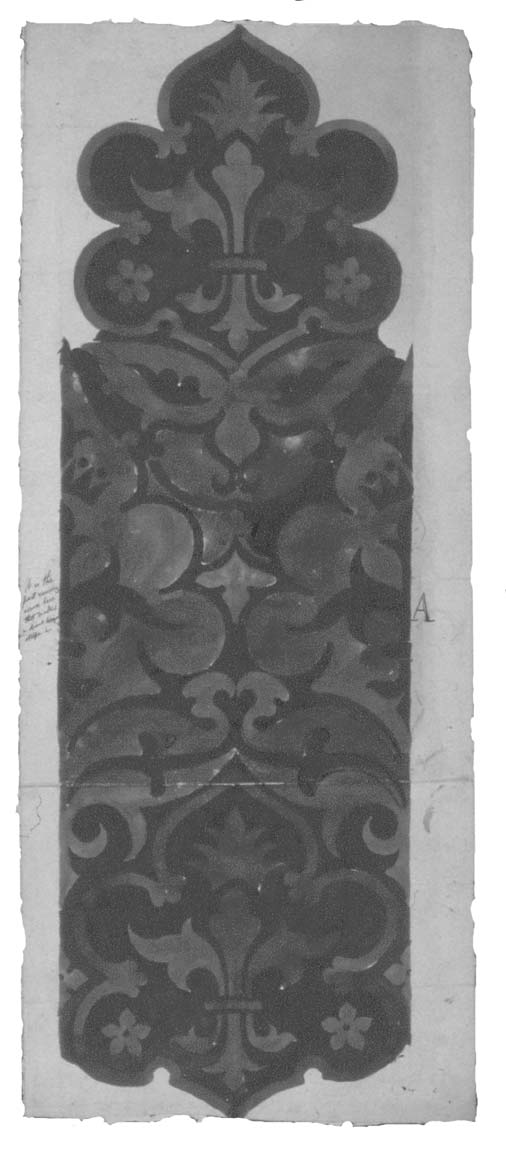
Figure 2. Recto after removal of mount board to one paper layer. Photography by Susan Catcher (click image for larger version)
Types of Damage
Each design was originally pasted onto mount board with a flour paste, an adhesive traditionally used in archival mounting. 3 The cream board demonstrated signs of acid degradation shown by the brown discolouration of the internal laminate causing brittleness and tearing into the object. Many had been adhered with little regard to repairing any initial damage and some designs had been applied whilst damp, causing the shrinkage of the paper support to create a drum effect, bending the board up in the process. Consequently, much of the later damage can be seen as a direct result of the previous mounting technique where any dimensional changes in the paper due to temperature and/or humidity fluctuations caused fractures and punctures because of the restriction in paper movement. The eclectic mix of support for the designs ranged between heavy water-colour paper, thin machine-made paper, tracing paper and indigo dyed bank paper. This meant that a method of conservation had to be thought out whereby the integrity of the designs would be maintained and a cohesive format for safe storage provided.
Conservation

Figure 1 (click image for larger version)
The conservator’s role is to preserve information and this is reflected in the choice of conservation methods. Removal of the board was carried out with a scalpel paring down to the last paper layer. Where pigments allowed, that is those not fugitive in water, the object was washed and the final paper layer removed with a bamboo spatula. It was discovered that many of the designs had been previously pricked out for transference and that some also retained evidence of carbon deposits from pouncing. This information needed to be visible, but encapsulation in Melinex would be inappropriate for the powdery pigments sitting on the surface, as the static inherent in the polyester film can pull areas of colour away from the support. Therefore, the introduction of a Melinex window on the verso of the new mount was considered a suitable option as the carbon deposits were held within the paper fibre interstices and less prone to static movement. This method was an adaptation from a previous project by a recent RCA/V&A MA student, Shiho Sasaki.4
Technical Information Revealed

Figure 3. Recto detail of iron-gall ink outline over painted design. Photography by Susan Catcher (click image for larger version)
-
The window was cut into the inlay paper to expose the object’s verso, perforations and pouncing.
-
The inlay paper edge was bevelled where it made contact with the object.
-
The Melinex was cut with a 15mm overlap, corners rounded and welded to the recto of the inlay paper using an ultra sonic welding machine close to the previously bevelled edge.
-
Hinges of water cut Sekishu, a Japanese mulberry paper with good fibre strength, were attached to the object with wheatstarch paste applied on the feathered fibres only. These were pulled through to the back of the inlay paper via incisions and were held down with wheatstarch paste applied on feathered fibres and adhered folded underneath the object.
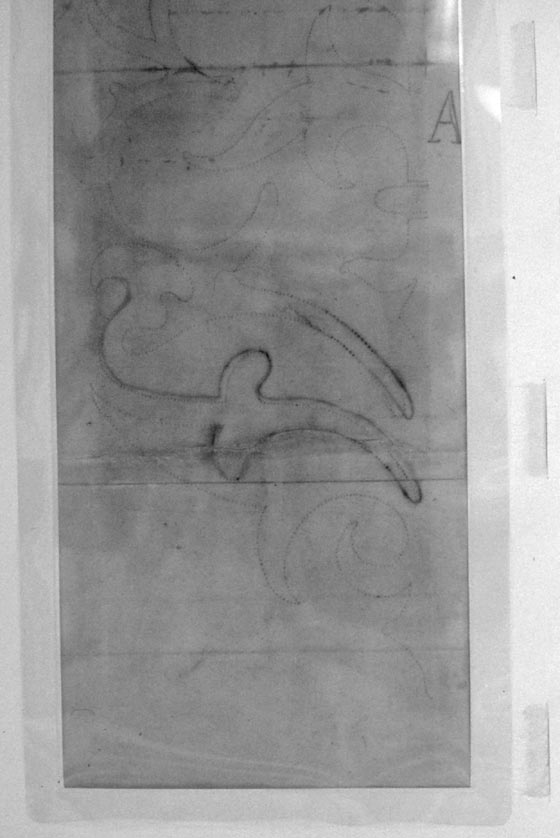
Figure 4. Verso showing Melinex window highlighting iron-gall ink strike through and pounced carbon deposits. Photography by Susan Catcher (click image for larger version)
A specific example of this technique can be shown with Textile Design D.788-1908 (Figure 2). This design is hand drawn and painted using gouache on a cream machine made paper. The object was adhered around the edges and had split across the overlapping line of the two sheets of paper. The iron-gall ink outline had fractured due to the acidic nature of the ink eating away the paper substrate (Figure 3). The mount board was removed in the manner described above and the object was dried between weighted felts in order to keep the tears and fractures in place for later repairs. These repairs were carried out using a wheatstarch paste and a lightweight Sekishu. The fibre direction was utilized to hold together the ink fractures and the colour of the repair toned down with pastels and watercolours. The Melinex window was prepared and the object floated to reveal all the technical information (Figure 4). This object had an additional design (D.788A-1908), which was replaced using hinges along the outside edge allowing a complete reading of the pattern and an insight into the design intentions of the artist (Figure 5).5
Conclusion
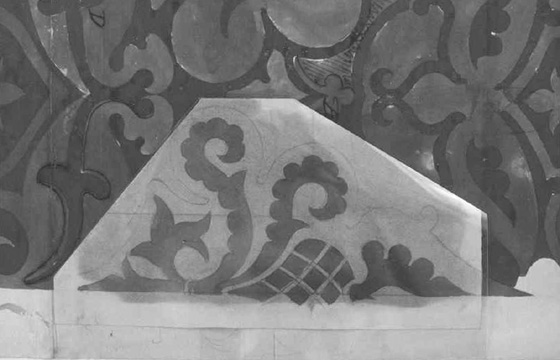
Figure 5. Position of hinged additional pattern to give an alternative reading. Photography by Susan Catcher (click image for larger version)
The window method finally adopted was as a result of: firstly, the need of the object; secondly, the requirement of the curator and lastly, to enable public access previously denied due to the poor condition of the collection. The necessary conservation to preserve valuable technical evidence was provided by releasing the designs from their restrictive mounts, repairing any damage and remounting in a format that made visible the information, whilst still supporting the paper object on the verso. Storage and movement to and from the Print Room was discussed and the eventual solution was to place the finished designs into individual primary folders of Archival text and then in groups of five into a stronger boxboard folder (1300 mic) secured with tapes. These took up the least amount of storage space and were of a size to allow easy carriage. The Print Room is in public use for four days a week, accommodating a daily average of forty-five people, many of whom are scholars interested in Pugin’s work. Others include children who find the decorative aspect of Pugin’s designs, especially the plant and animal forms, easy to understand. The mount margin of 30 millimetres and the ‘window’ exposing the verso provides safe handling and reveals important technical information previously obscured by an old mounting technique.
Acknowledgements
Pauline Webber, Head of Paper Conservation and to Fiona Leslie, Curator in the Design Section of Word and Image Department.
References
1 Lewis, P & Darley, G, Dictionary of Ornament, Macmillan, 1986
2 www.pugin.com (Pugin Society)
3 Horie, C V, Materials for Conservation, Butterworth- Heinemann, 1987
4 Sasaki, S, Alternative Inlay Method of Surimono Mounting, MA Thesis RCA/VAM, 1999
5 Wedgwood, A, AWN Pugin and his family, V&A Publications, 1985
Autumn 2003 Issue 45
- Editorial
- Planning 'Gothic: Art for England 1400-1547'
- Climate monitoring of objects for the 'Gothic: Art for England' exhibition
- The October Labour
- Conservation of an English cadaver tomb
- Decision making: Technical information revealed
- V&A in the regions: Conservation Summer Schools at the University of Derby
- Elizabeth Martin 1947-2003
- News from RCA/V&A Conservation
- Printer Friendly Version of Journal 45