Last autumn I was awarded money from the Assistant Curator Training Fund to attend an ‘Introduction to Sculpture’ course at City Lit, an adult education college based in Covent Garden. I started as an Assistant Curator in the Sculpture department in April last year, and as a haptic learner I wanted to gain a better understanding of the range of materials and techniques used by many different sculptors. The course is designed to provide an introductory overview into a variety of basic sculptural techniques, and the initial sessions took the form of short projects to produce a series of small models or maquettes. In the latter weeks we were able to develop one of these skills through a small personal sculpture project. Prior to this course I had never had the opportunity to work practically in the medium of sculpture, so I had great fun experimenting!

In the first session we began by working in clay and made a series of small forms and shapes. We investigated sculpture as both a subtractive and additive process, the importance of developing the structural integrity of the form and the spatial possibilities of a form, and we explored both the occupied and unoccupied spaces of the clay. This session involved the continual making and re-making of different shapes, and was a fun start to the course; forcing us to think spatially and materially rather than jumping straight to aesthetics and style.
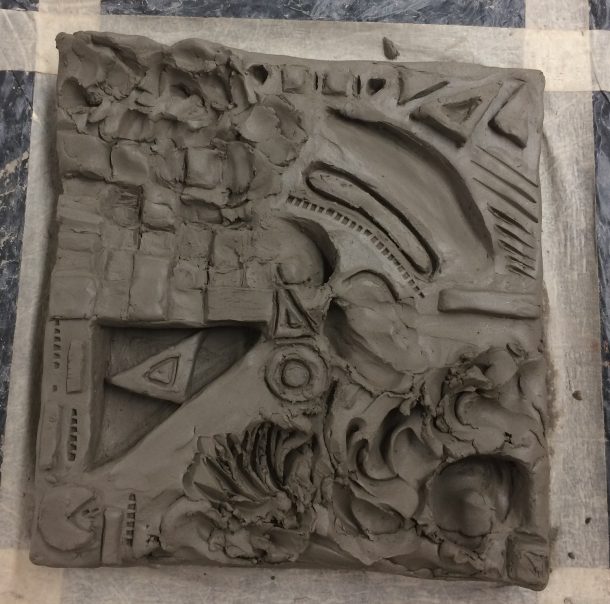
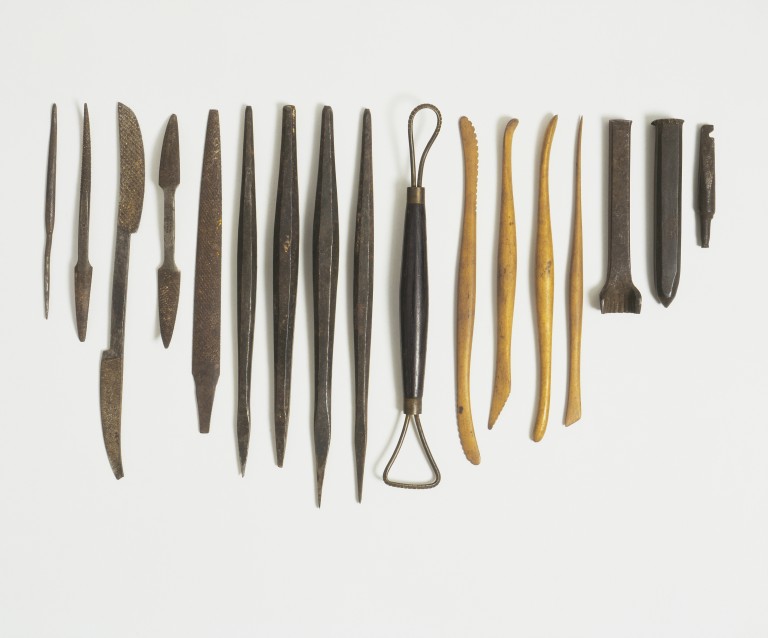
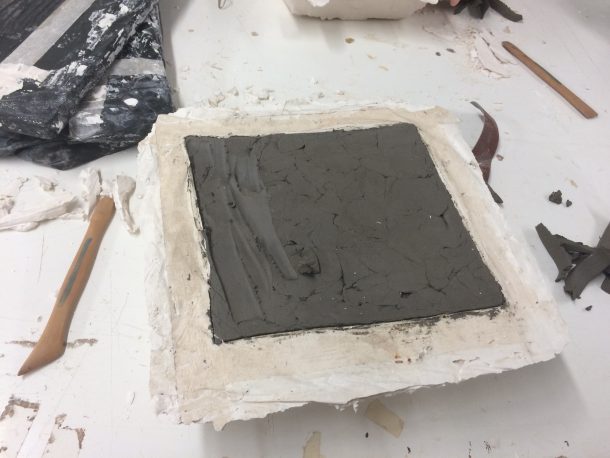
In the second session we made a square relief in clay, and our tutor encouraged us to experiment with types of mark making. We used a range of modern sculptural tools, which remain almost identical to those used traditionally by sculptors to create work in the museum’s collection (see Fig.1). These tools can be used to help build forms and add fine detail where fingers cannot, draw in the soft clay, and practically can aid in the removal of excess clay. The eventual aim was to cast the relief, so our tutor also encouraged us to create a wide variety of surface textures and depths protruding into and out of the relief surface.
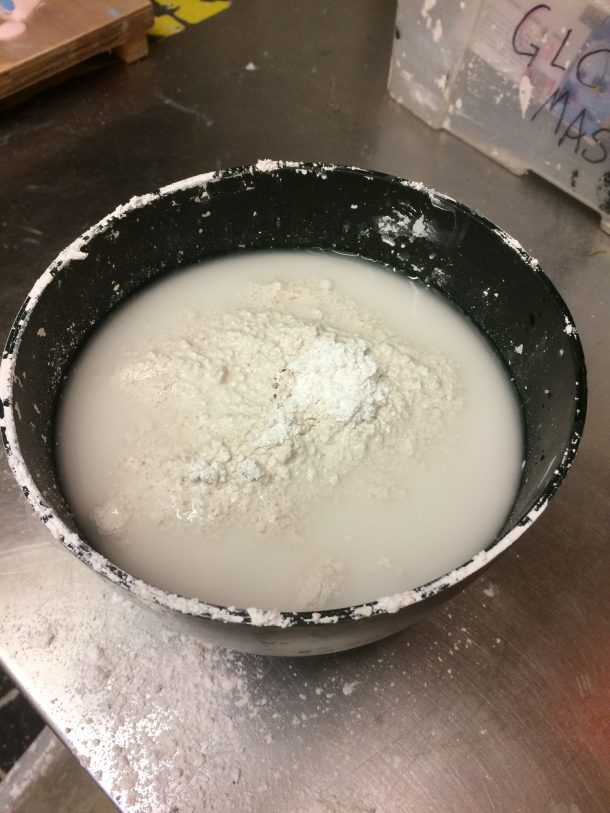
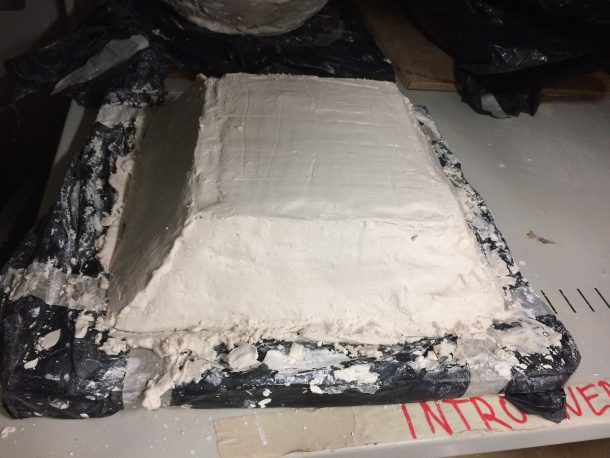
Once we had completed our relief we then cast it to create a mould. This involved carefully mixing plaster with water, allowing it to slowly thicken until it became a workable consistency (the thickness of custard!). I then covered the relief in layers of plaster, allowing each layer to dry before re-mixing and applying new layers of plaster to create a solid mould (see below).
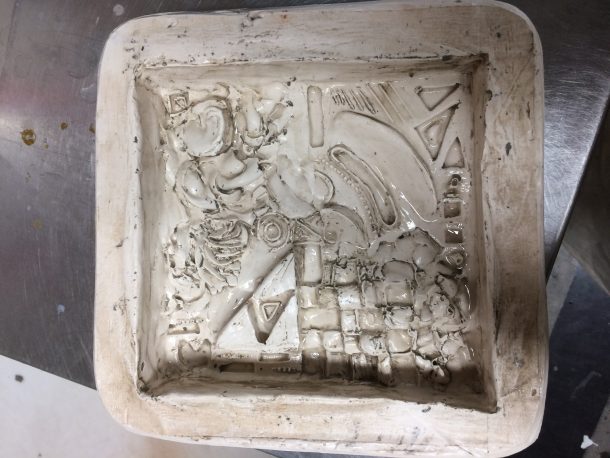
Once the clay was completely and thickly covered with plaster, I returned to it a week later to remove the clay from the plaster mould. Using a wire ended tool, I was able to carefully dig out the clay to reveal the mould below. This process had to be undertaken very carefully so as not to damage the negative plaster mould below, and I used a paintbrush and water to remove very small pieces of clay and to clean the mould afterwards.
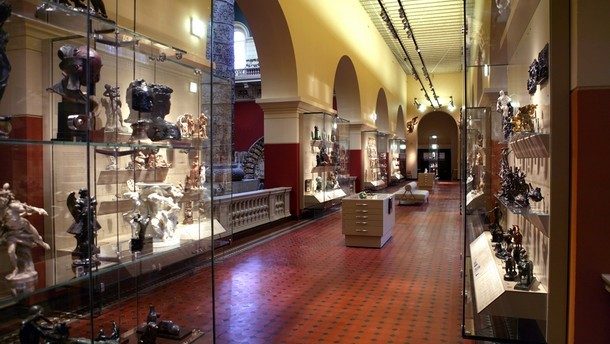
This simple casting technique demonstrates the basic process of mould making, and a similar technique would have been used to create the casts on display in the Cast Courts. In the 19th century moulds were often made from plaster, but could also be made from gutta percha, gelatine, or clay. Today moulds continue to be made in plaster, and silicone is often used as a quick and effective alternative, but the process of casting differs little from the 19th century practice.
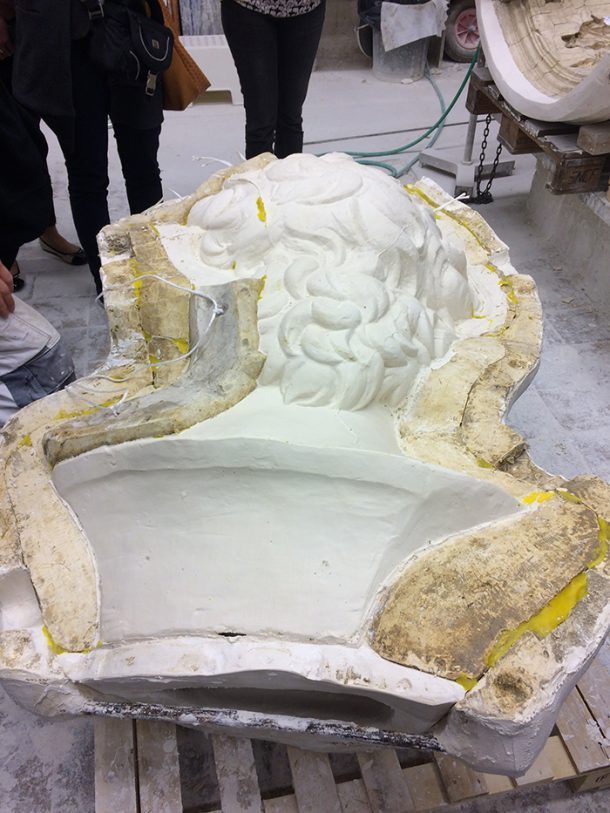
Flatter, smaller objects in low relief (such as my clay relief) usually require only one mould to cast the object. For more complex objects, with a raised surface (such as for David below), the mould would have to be made from many sections, known as piece-moulds. These pieces are held together in the so-called mother-mould, in order to create a mould of the whole object. Once the object has been cast from this mother-mould, the piece-moulds can be easily removed one by one, to create a cast of the three-dimensional object. The process I used differs in that I had to destroy the original clay relief to produce my negative mould, whereas the casts in the museum collection were made from moulds that could be removed without damaging the original work.
Unfortunately, during my course there was not enough time to then cast my original clay relief from the negative mould. However, if I were to do this I would need to mix plaster and water and pour this into the prepared mould. Prior to pouring in the plaster, the mould should be coated with a separating or paring agent to prevent the newly poured plaster sticking to them. The smooth liquid state and slight expansion while setting allows quick drying plaster to infill even the most intricate contours of a mould. Once set the mould could then be removed to leave a finished plaster reproduction of my original clay relief.
Having completed casting we then had the opportunity to try out wood carving and stone carving, and I also made a small sculpture in metal over the next few weeks. These were all great fun, and required us to use a range of different tools and equipment in the workshop. However, the results were not worthy of a photograph! In the second half of the course we were encouraged to develop an individual project, and I chose to continue working in plaster.
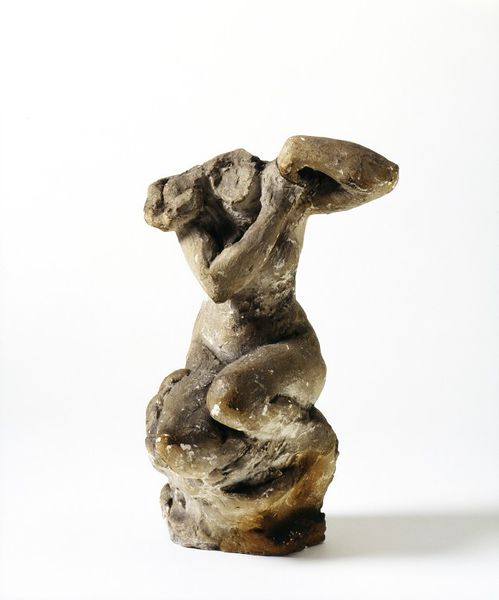
Working on the Cast Courts project requires me to spend a lot of my time studying and caring for the plaster casts in our collection, and in this course I really enjoyed learning how to make a very basic mould. However casting is not the only way plaster has been used historically by sculptors, and I therefore decided to continue working in the medium to gain a better understanding of how else plaster can be used. Plaster is a highly versatile and adaptable material which dries quickly and enables work to be produced rapidly in a variety of ways. Historically plaster has been used as an essential part of many sculptor’s practice, and is frequently used in either the development process or to realise the final work. In Figures 7-10 I have picked out a couple of objects made from plaster in our collection to demonstrate the versatility of the material, and how it has been used by different sculptors.
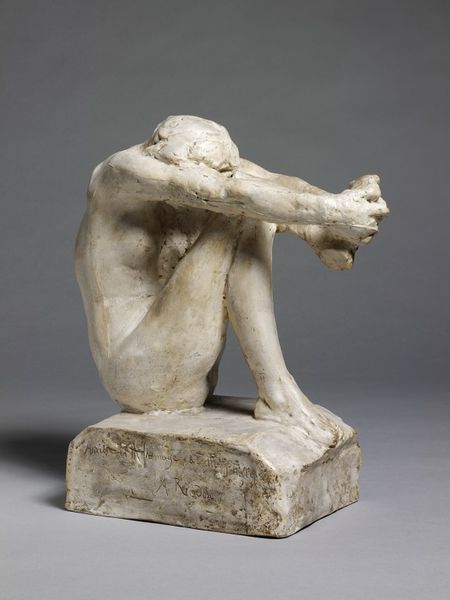
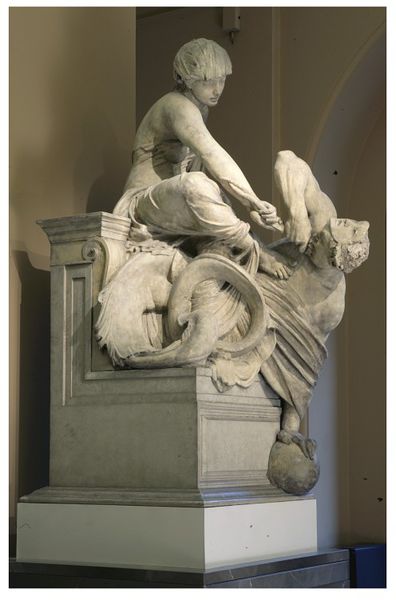
Figure 9. Model for the Wellington Monument: Truth and Falsehood, Alfred Stevens, 1867-8. Plaster, England. V&A 321A-1878. Gallery 22, The Dorothy and Michael Hintze Galleries.
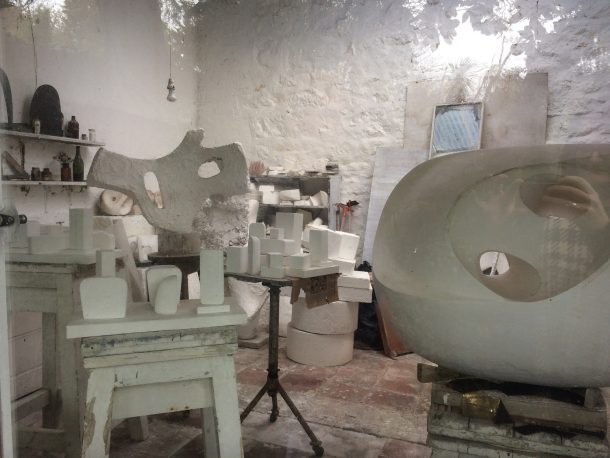
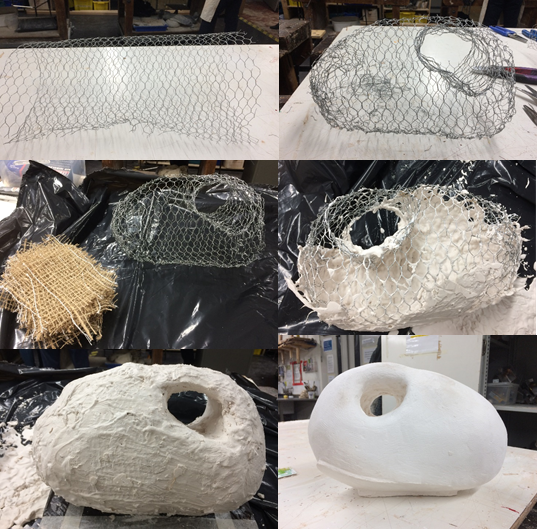
My decision to develop a project in plaster was also influenced by a recent trip that I had taken to Barbara Hepworth’s studio in St Ives, and so I decided to create a plaster sculpture inspired by this trip. I would have liked to create a figurative sculpture, however using plaster to create a rounded form is much quicker and was better suited to the five weeks I had to complete my small sculpture.
To make a form in plaster it is usual to make an armature to create structure and support the material. In this instance I used chicken wire to create the basic outline of my form, but aluminum is often used by many sculptors. The shape is then solidified by building up the surface with scrim, a strong coarse fabric, soaked in plaster. Once this is dry it is then possible to build up the layers of plaster (this time a much thicker and gloopier consistency!) to create the form. Then using a series of rasps, rifflers, and files, the plaster can be shaved down and smoothed to create the desired finish. I have documented this process in a series of photographs below.
This course was a fantastic opportunity to familiarise myself with a range of sculptural techniques, and I very much enjoyed getting my hands dirty! Working in plaster was particularly enjoyable, and it was great to gain a better understanding of how the material can be used to create a variety of different results. If you’d like to learn more about the range of different materials and techniques used in the medium of sculpture please visit Gallery 111 at the V&A where we explore these processes through a variety of objects and films. However, having the opportunity to try out a number of techniques was hugely informative and if you are interested in learning about a specific technique I would highly recommend giving it a go!


Thank you for sharing this post, from he sculpture supply tools, materials and procedure of your art work. This is amazing! Even your shop is very elegant. I’m hoping to make my own masterpiece like your. For your reference, please visit this link: https://www.afasupplies.com/
Useful information and a great thing to have a go at home!
I am make ng a Giacometti Style sculpture for college. I’m using scrim and plaster. I would like to paint him in skin colours. What paint would suit the plaster and scrim?
Hope you can help
Barbar
Thank you so much for such clear and detailed outline of the process. Could you tell me how long do you wait between layers of plaster? Also, what is the name of the wire tool and the liquid separator you used to separate the clay from the plaster? Thanks a million for your help. Nelly
One last question if I were to cast the plaster directly into a clay mold and embedded into a wood frame ready to hang on the wall once dry, how do I go about doing that? Thanks again. Nelly