Sadly, this is my final post on the museum blog for Disobedient Objects…but before I move on to new adventures, I’d like to give you a little glimpse into more of the behind-the-scenes work involved in the run up to Disobedient Objects. I am going to focus a little bit into two very simple mounts I made prior to the show’s opening last month.
Nearly every object featured in the show requires a bespoke mount, and luckily I have had assistance in ensuring that all of these are done in time*. Making a mount for a museum object can be quite a long and technically challenging process. With most objects, we are trying to achieve a mount which fully supports the object structurally, but is not aesthetically obtrusive. (i.e- we try to keep it as invisible as possible for the visitor)
My months spent in the mount workshop leading up to Disobedient Objects were rather unique. Whilst the bench I was working at was filled with images and objects relating to contemporary activism, fellow technicians Roger and Andy occupied the workbenches opposite me as they worked on the mounts for the Europe 1600-1800 galleries. It’s quite bizarre to be working on models of Zapatista rebels whilst your colleagues next to you are handling an 18th C Putti.
I think it’s important to reiterate just how much care goes into designing the most suitable mounting method for an object. If we look back to Clair’s post from earlier on from the Disobedient Objects blog, she gives us an insight into the meetings involved.
Clair, myself and Line (Exhibition Designer) met with Sarah and Amy from the Exhibitions department to go through each of the objects individually. Line, Clair and myself created mount ideas that would fit with the design aesthetic of Disobedient Objects but would not cause harm to the object throughout the 6 months of the exhibition’s duration.
Of course, these ideas would need to be feasibly fabricated in the mount workshop within a relatively short period of time and be suitable for use when the show goes on to tour internationally. For example, if a future venue chooses not to use a similar set build as we did at the V&A, the mount I had made must not be entirely dependent upon this, and should be re-usable.
Admittedly, this can be quite challenging, especially when:-
- Some of the objects would not be shipped to the museum until a month before the show opens. This meant that I spent some time mocking up mounts for objects I had yet to see.
- I had no idea how the exhibition design would look at future venues for Disobedient Objects, so the mounts would need to be easily adaptable.
Often, the most simple of ideas prove to be the most effective, so I’ll talk through the process of making a mount for one of the Bust cards featured in the exhibition.
With smaller objects like this one, I decided to use the thinnest possible Perspex that could be easily cut down to size in our workshop. By using Perspex no thicker than 3 millimetres, it creates a very minimal shadow, and the object can be easily strapped to it once I’d finished sanding, buffing and polishing it on all the edges to achieve a smooth finish.

In the original planning stages of the design, the Bust cards would be sitting on brass stalks, so this was the original mock-up mount for the display case:
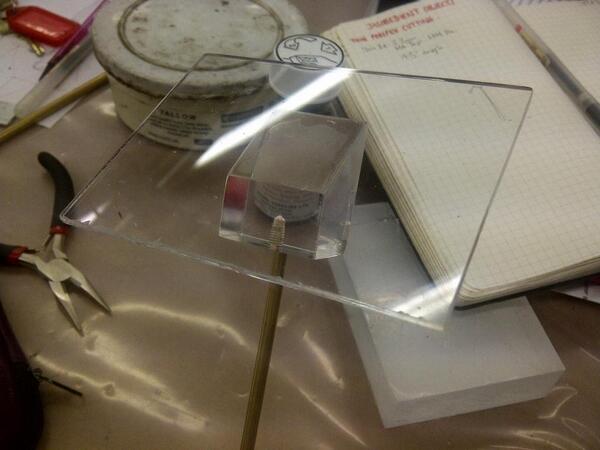
We didn’t go ahead with this idea in the end, and everything in this particular display case would sit on its own bespoke Oriented strand board (OSB), which is a material that appears frequently in the final exhibition.
Using this to mount the works was very simple. By using a router, I made tiny Perspex split battens for the piece that could be screwed into the OSB easily (each screw hole is also countersunk so the mount sits completely flush with the OSB and does not move/vibrate due to a protruding screw head). For these smaller works, I secured the one part of the split batten to the Perspex backing sheet using Plastic Weld. For fear of sounding a little geeky, I won’t go into too much detail how impressive this substance is, but it’s pretty magical how quickly you can bind two pieces of material together with a few drops of it.
Anyway, here are the finished pieces:
As you can see, I’ve also Plastic Weld-ed a piece of the same thickness Perspex to the bottom of the work, so if another venue chooses to display this work flat then it will not wobble on its mount.

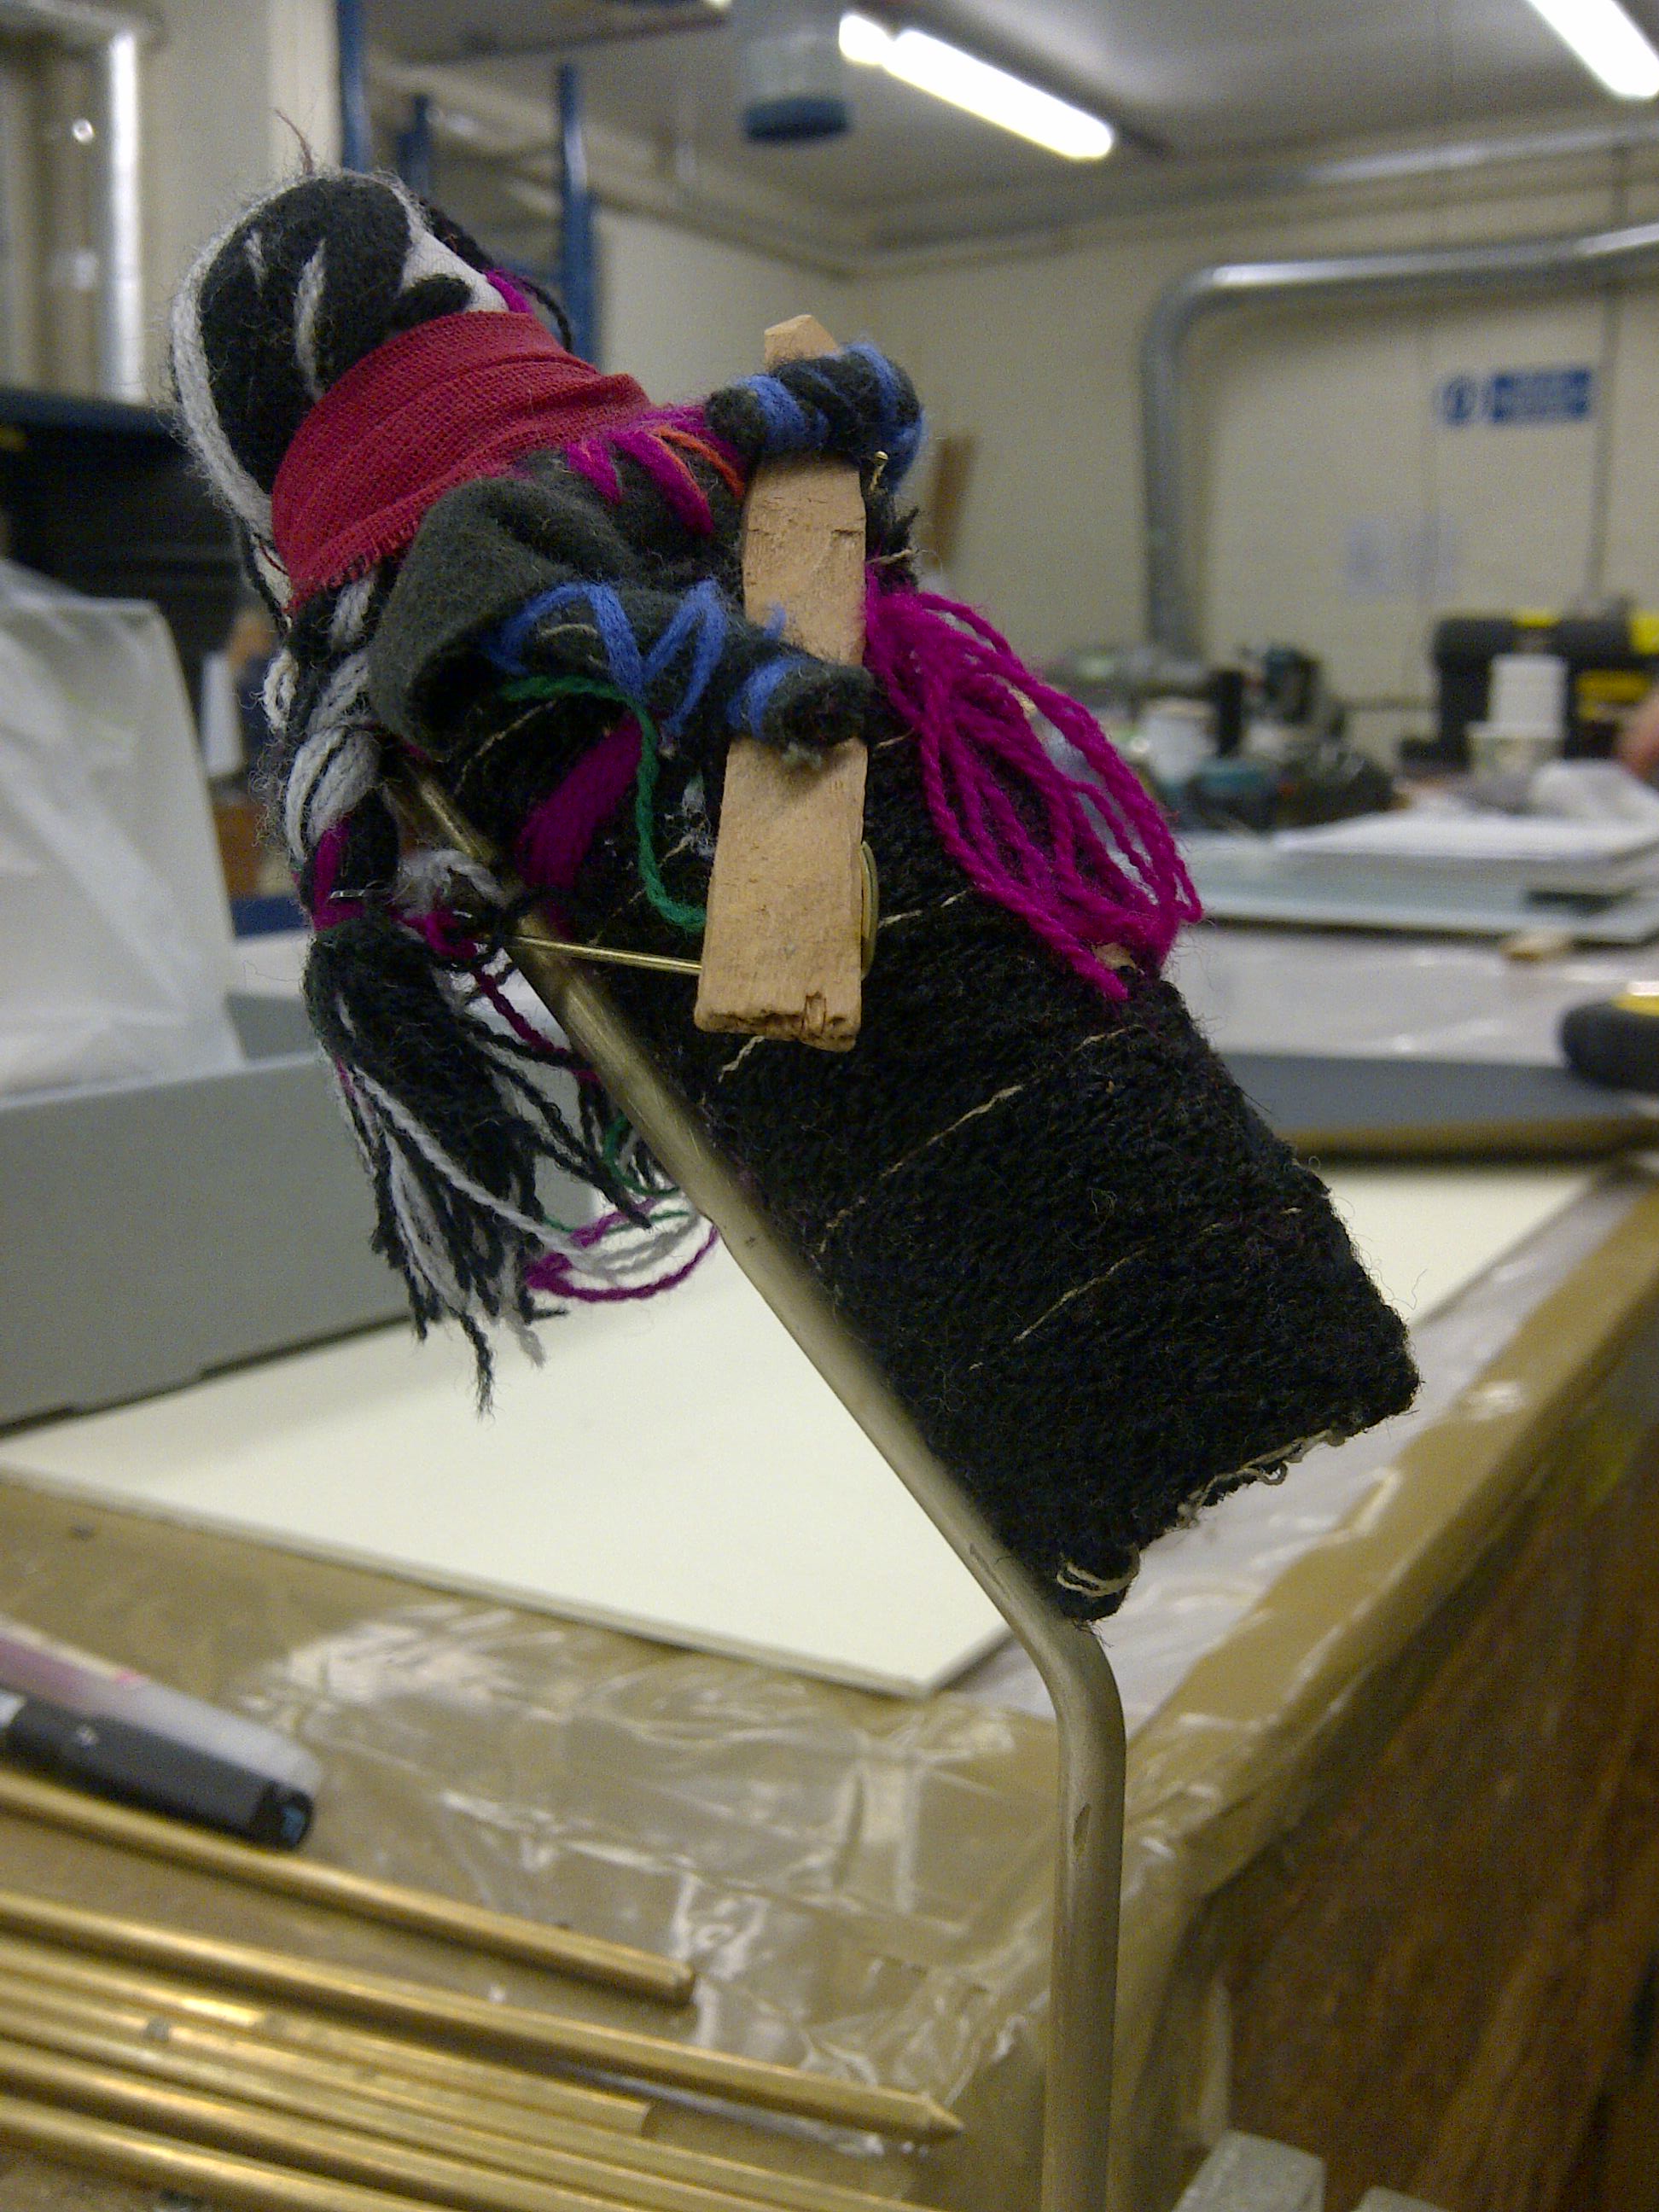
Now, to move on to the Zapatista Dolls; these are quite different for the process involved. Shortly before I started focusing entirely on Disobedient Objects, I was actually mount making for the Small Stories exhibition at the Museum of Childhood, where I made mounts for objects like this little guy here:

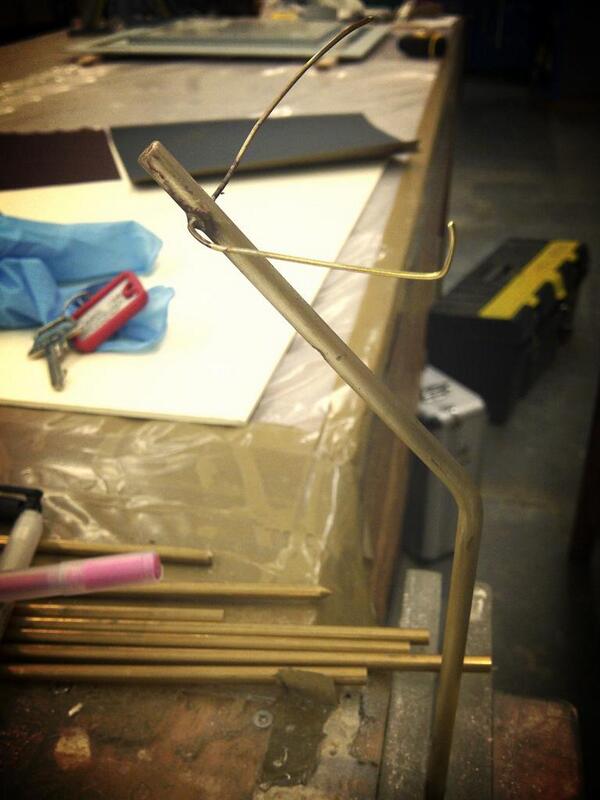
The Zapatista Dolls are of a similar size and weight so I decided to use a similar and minimal approach when mounting these, especially as they could just be supported underneath their arms to hold them in place when on display.
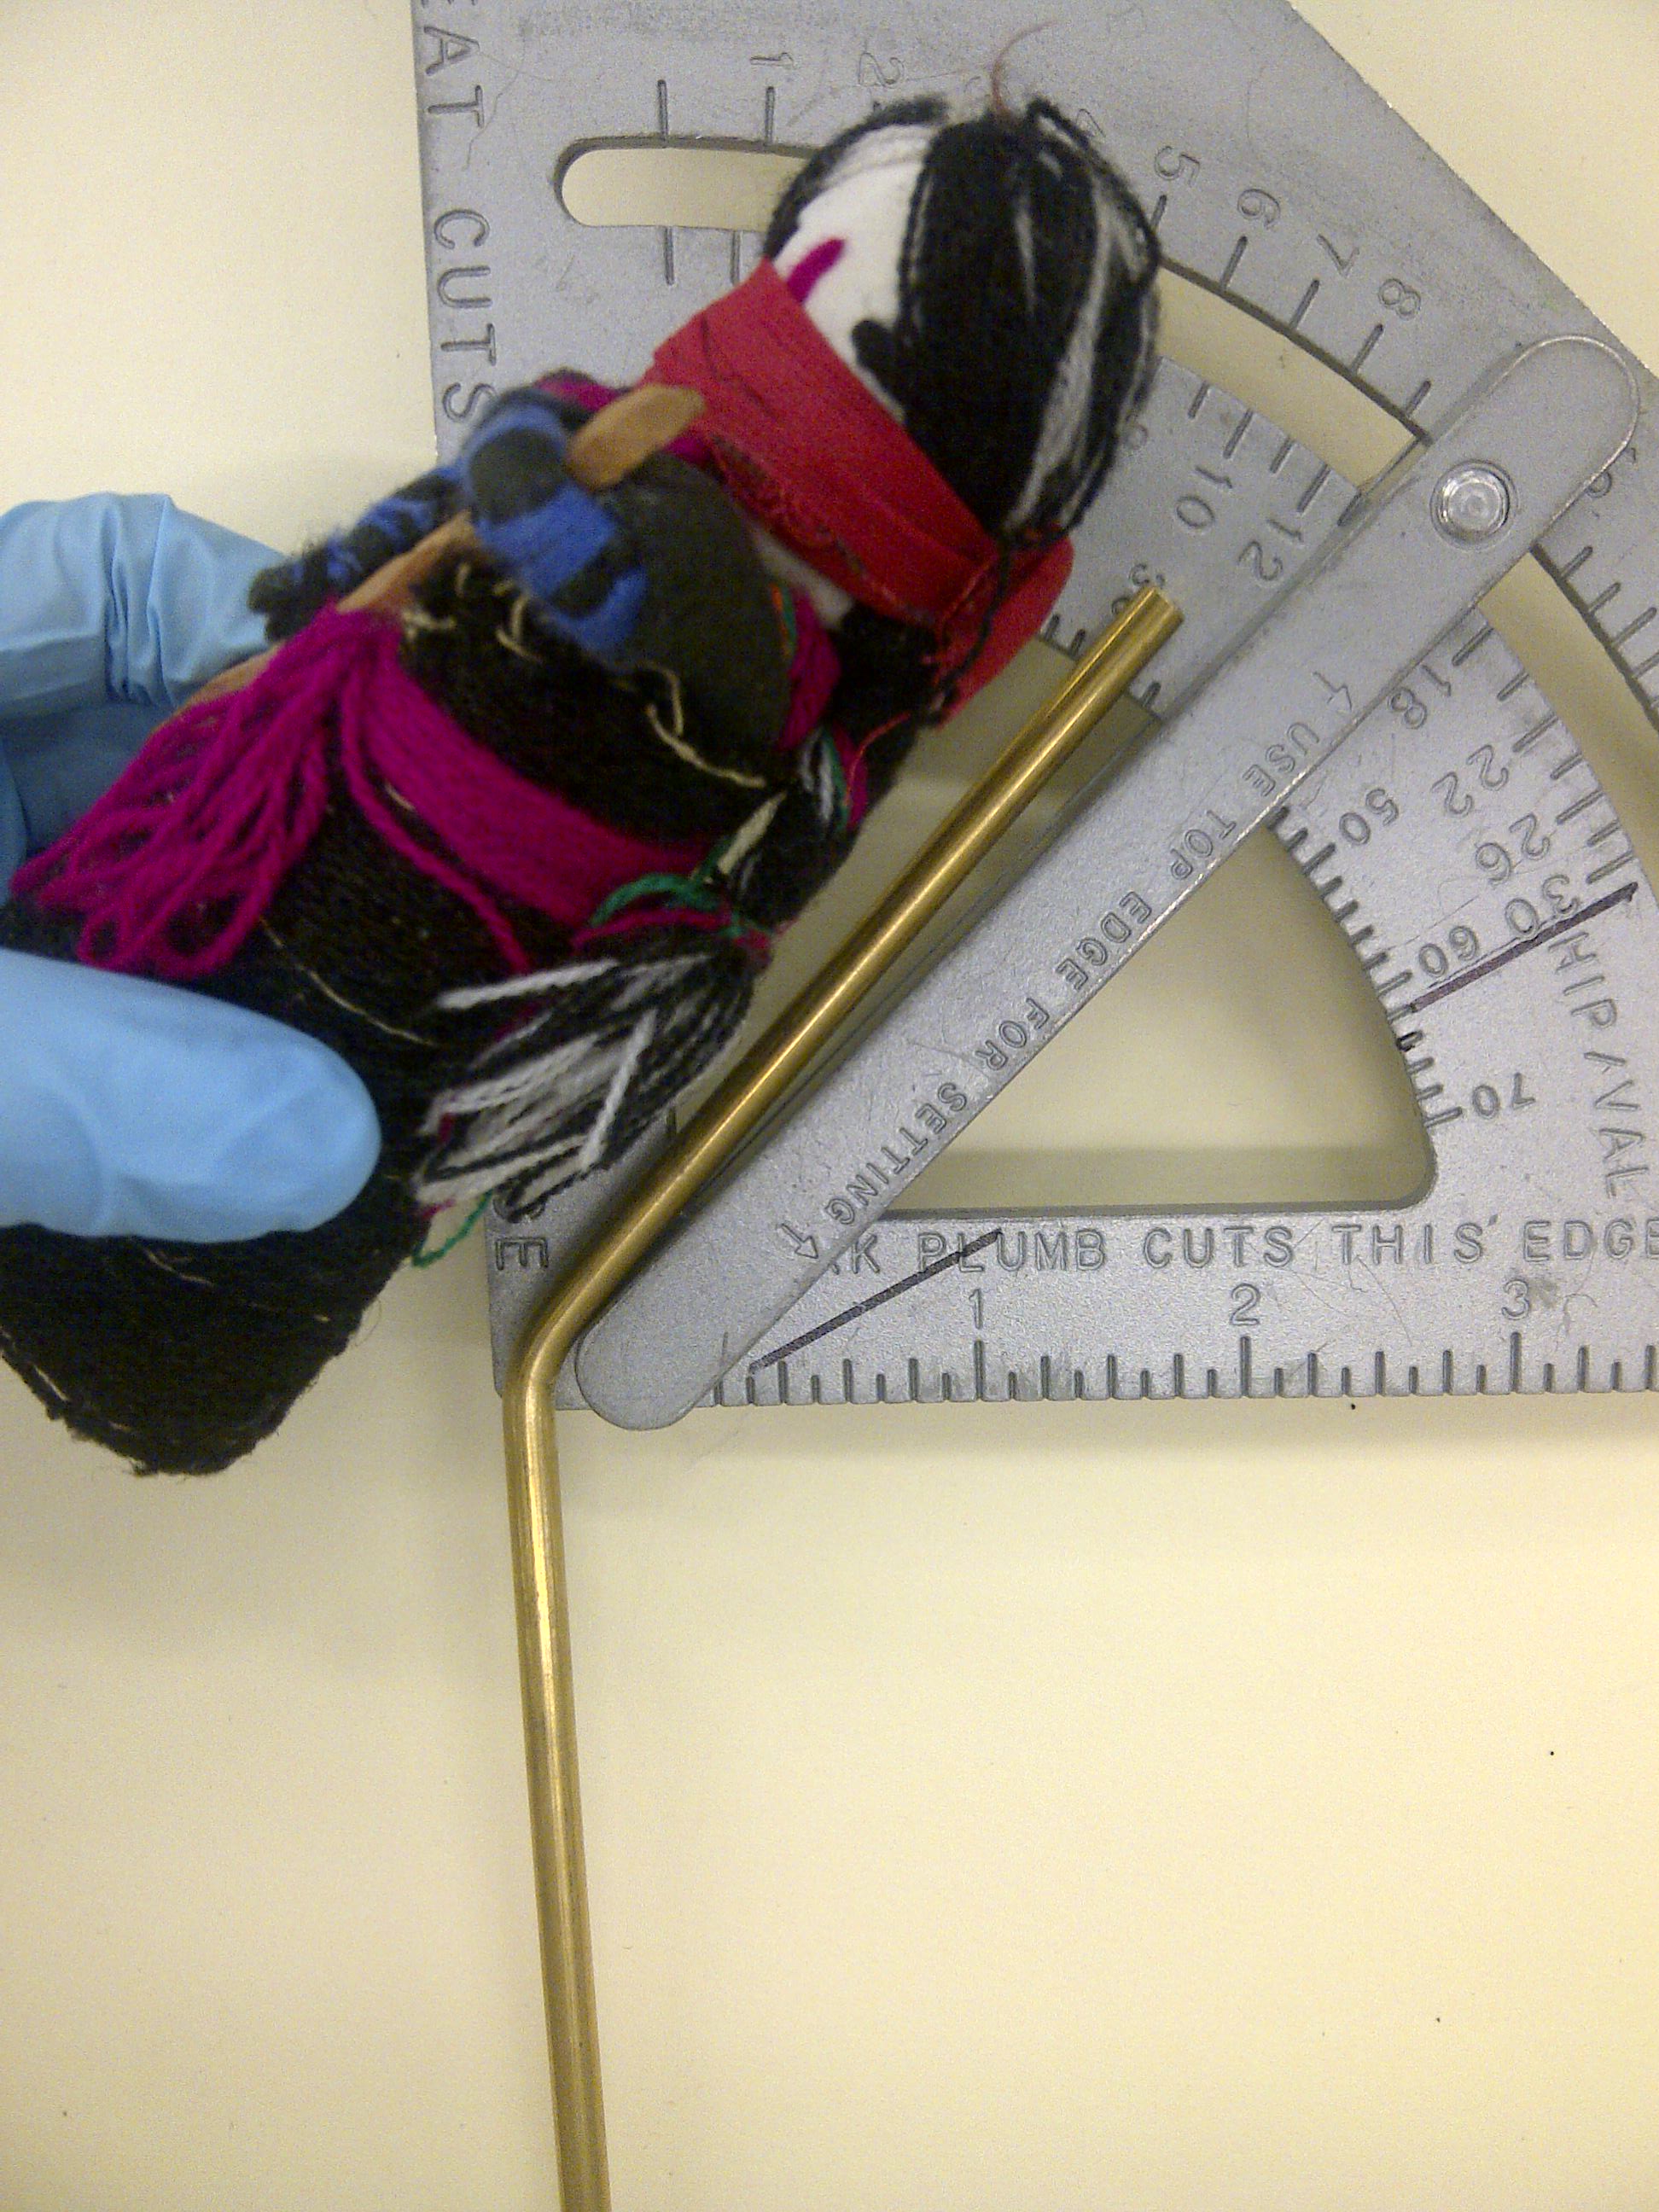
It’s a little fiddly to solder on these tiny pieces of brass wire to the thicker brass rod, but as the dolls are so delicate I didn’t want an obtrusive mount. It can take a little practice, but I think it definitely pays off. We often use silver soldering for mount making at the museum, and it’s definitely been one of the most enjoyable things here. It was actually during a meeting with the designer Tom Dixon at the V&A last year that inspired me to start learning more about metalwork and the processes involved. Two books about welding and hours of mentoring from fellow technicians later and I am even more excited about the endless possibilities for mount making with different metals in a museum environment.
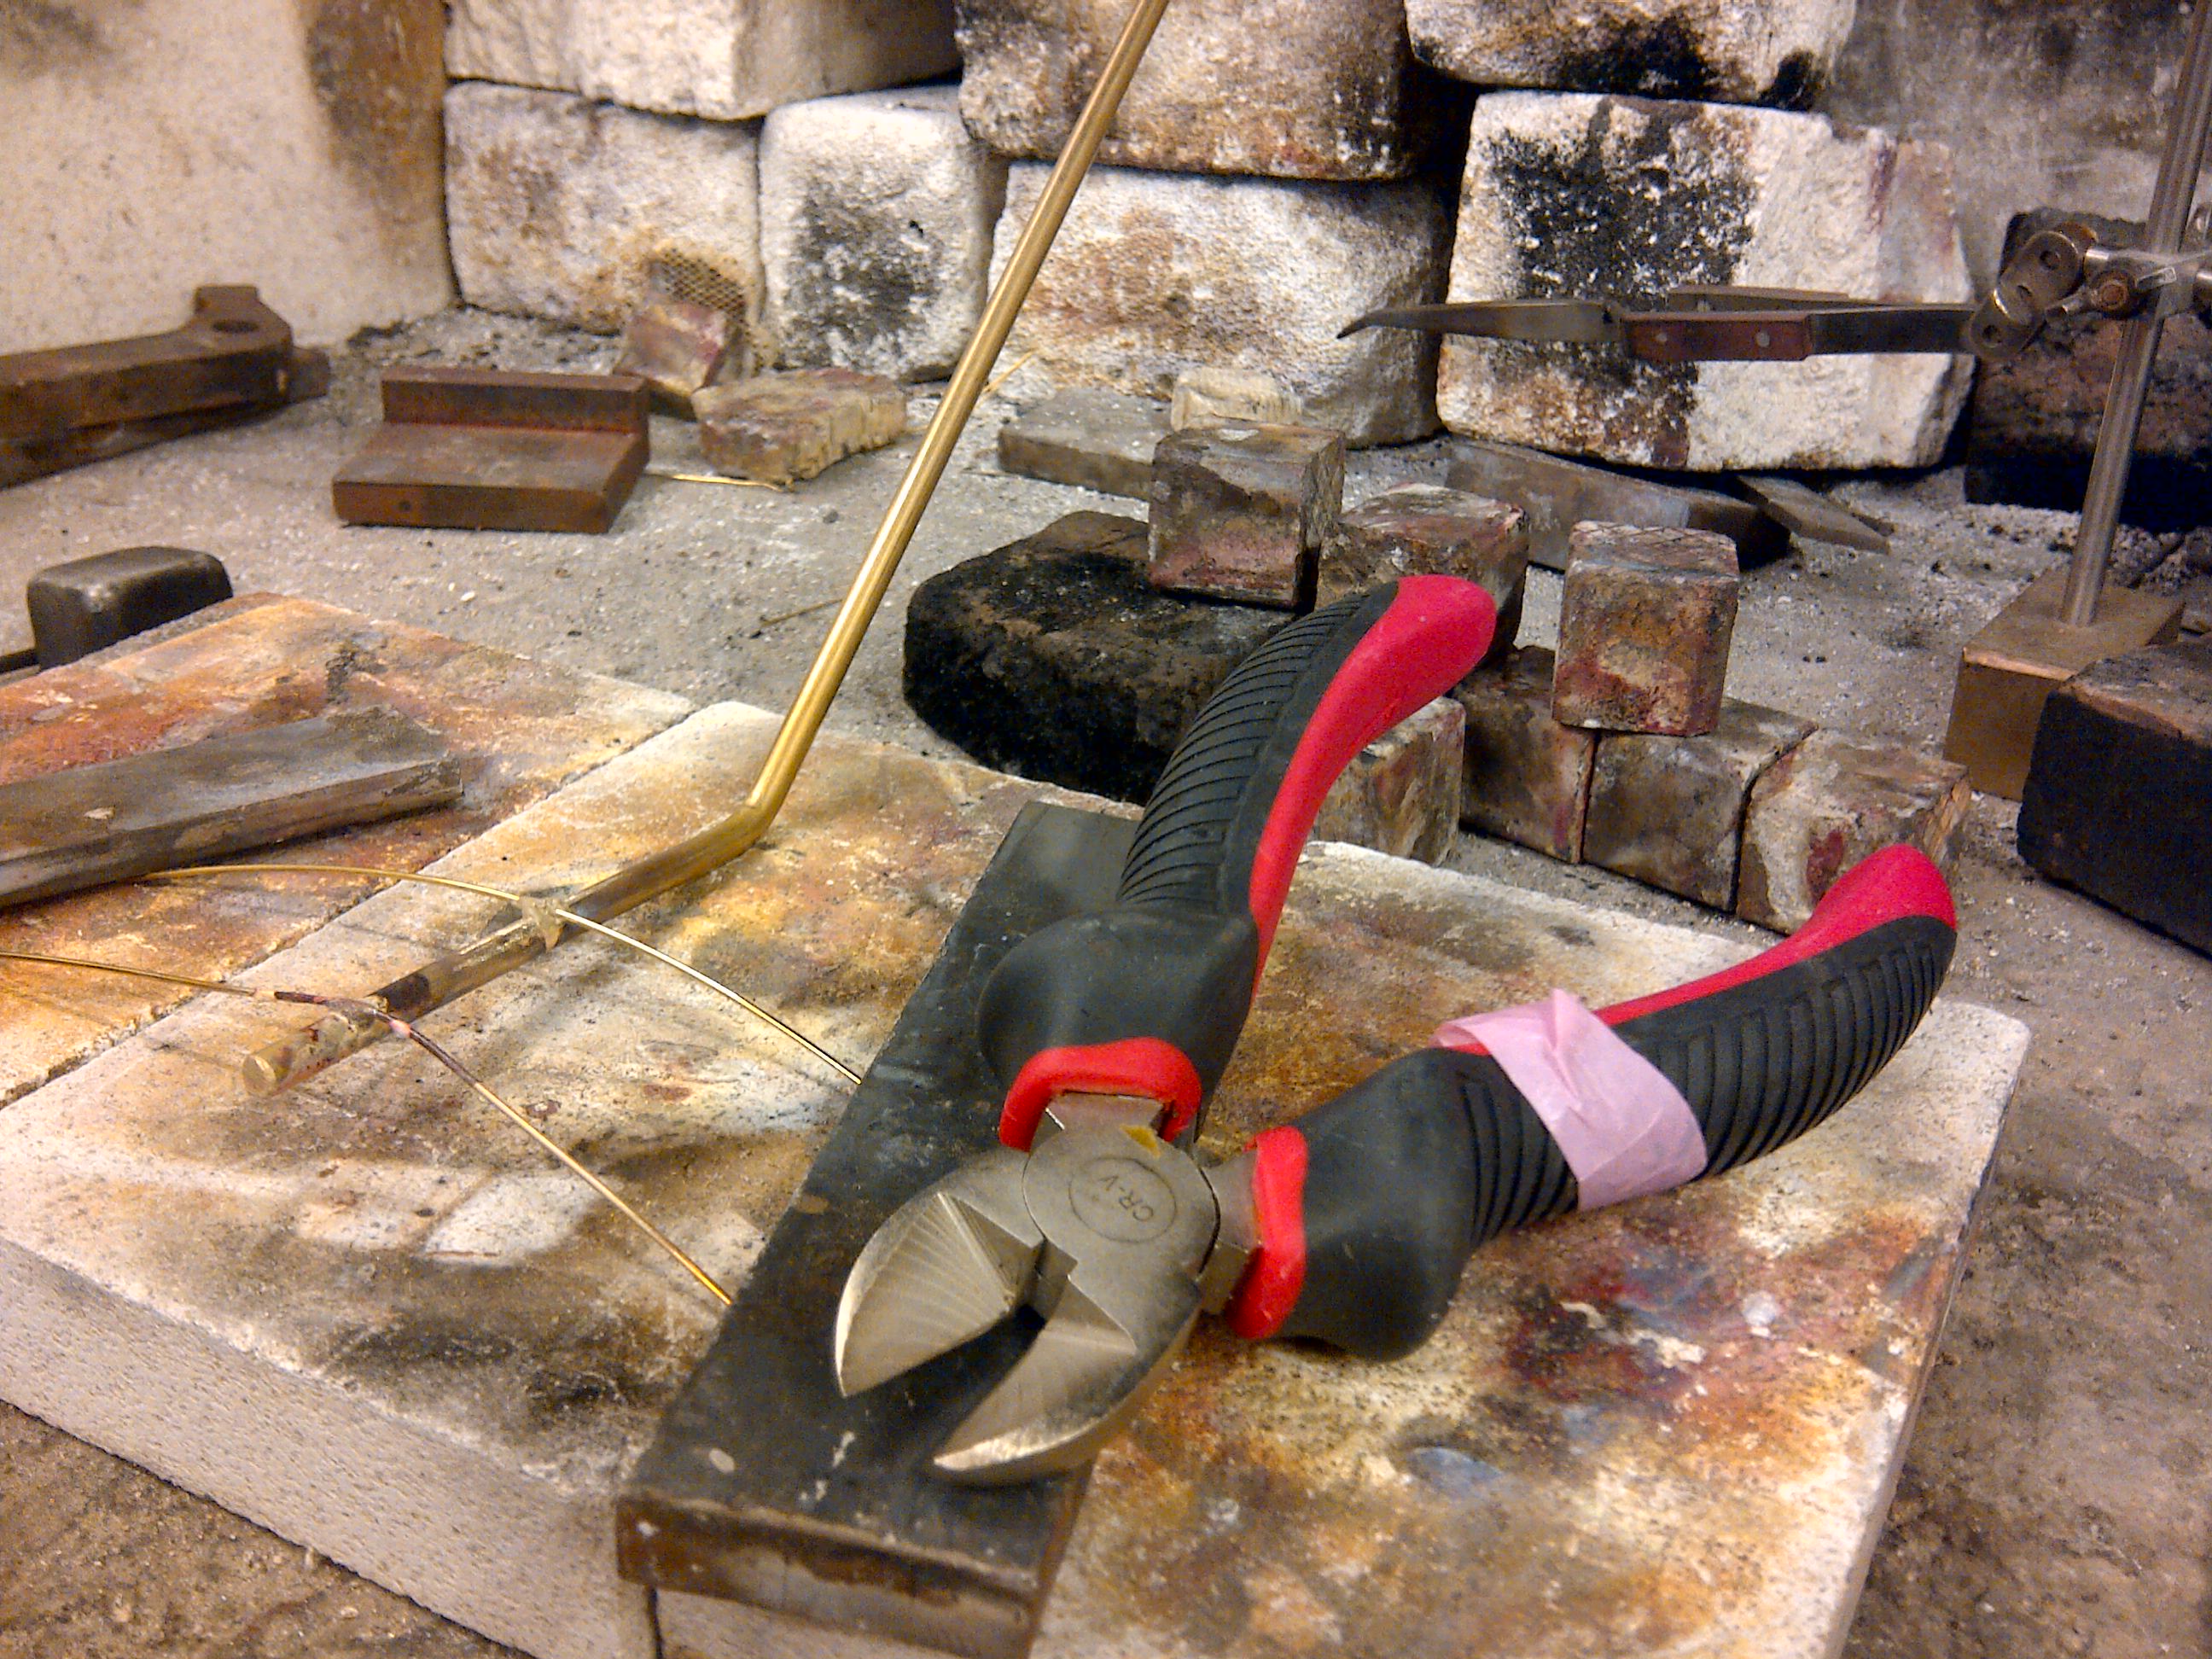
After this photograph was taken, each mount was then taken off to be lacquered and left to dry for 24 hours. I then threaded shrinkable tubing onto the wire and moulded these evenly into place using a heat gun, which was done to avoid any metal snagging against the fabric of the doll.
*my enormous amount of gratitude goes out to Phil, John, Matt, Holly and Alex- I couldn’t have done it without you!

Thankyou for this fascinating piece. I’m a fellow geek; no detail too anoraky for me! Writing about the V and A and this show for a magazine. Love your blog.