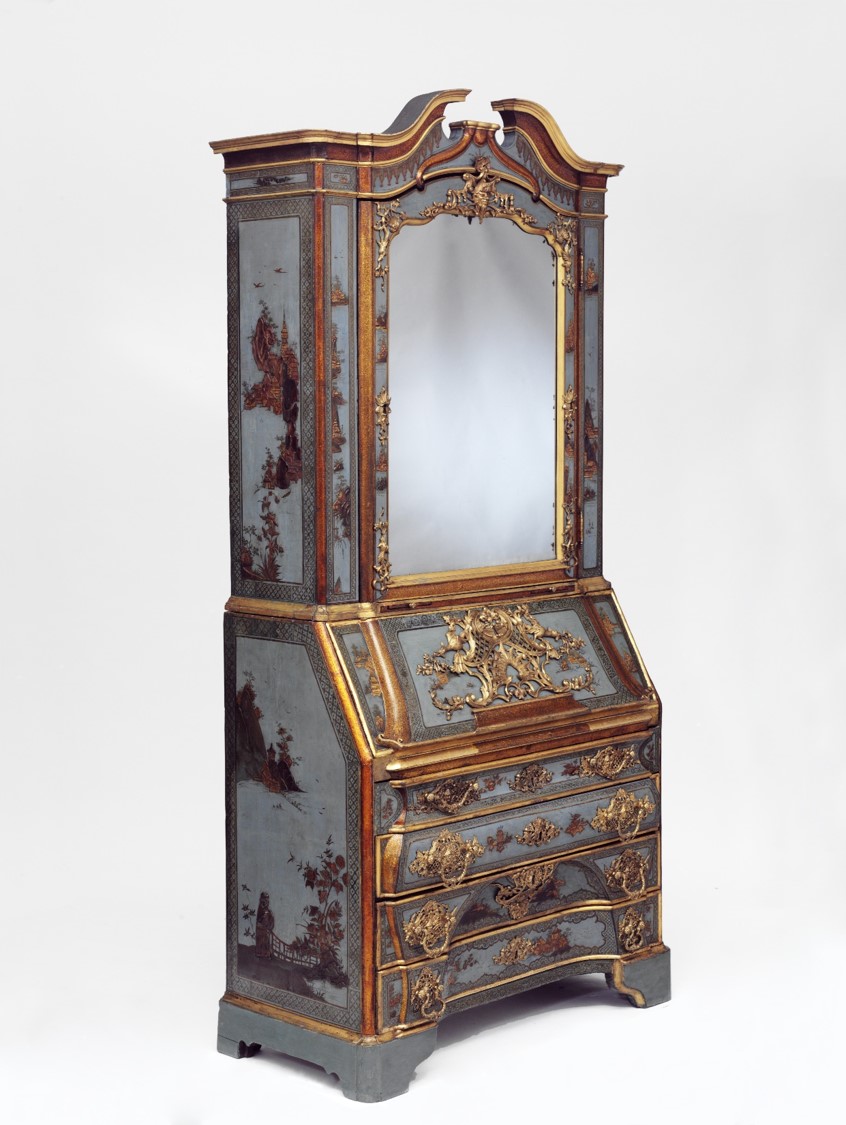
Today’s post comes from Tristram Bainbridge, Furniture Conservator, who has been working on this eye-catching 18th-century writing cabinet for display in the new Europe Galleries.
The cabinet will feature in the Fantasies display, which explores fashionable Europeans’ fascination with Chinese and Japanese imagery and the resulting hybrid style that became known by the French term ‘chinoiserie’. It is beautiful example of furniture made with a European structure but with a surface imitating Asian lacquer. It also features decorated with raised and flat motifs in a chinoiserie style.
Tristram tells us how he went about bringing back its sparkle:
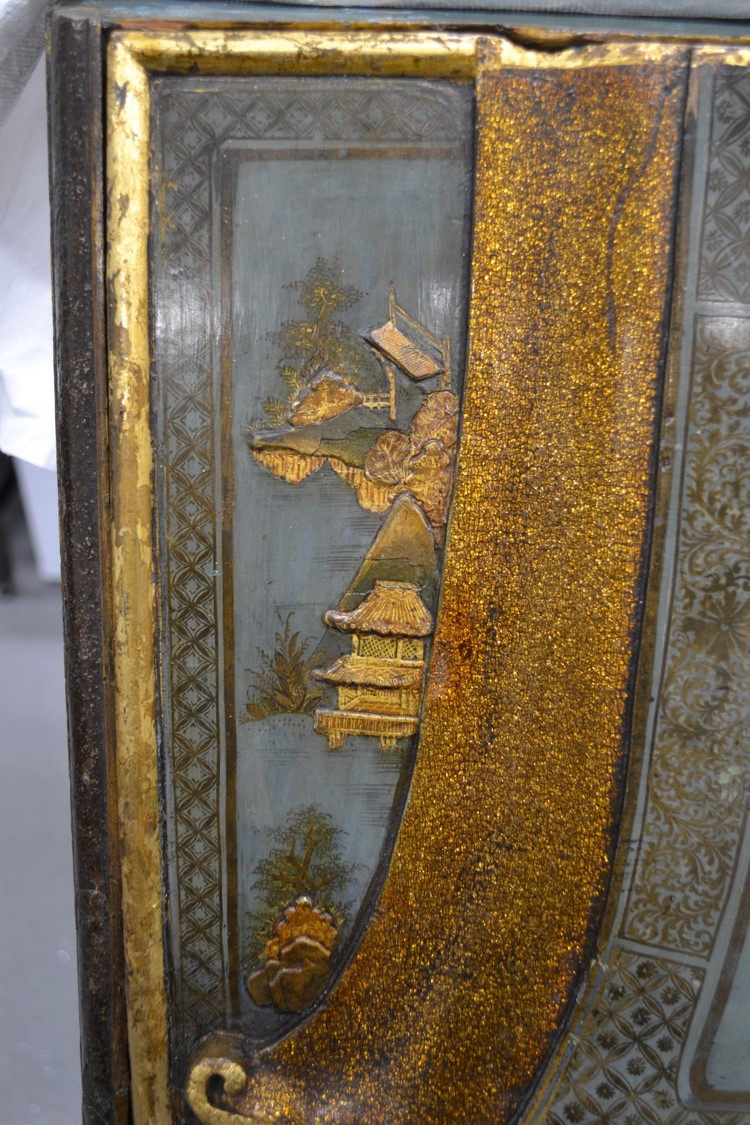
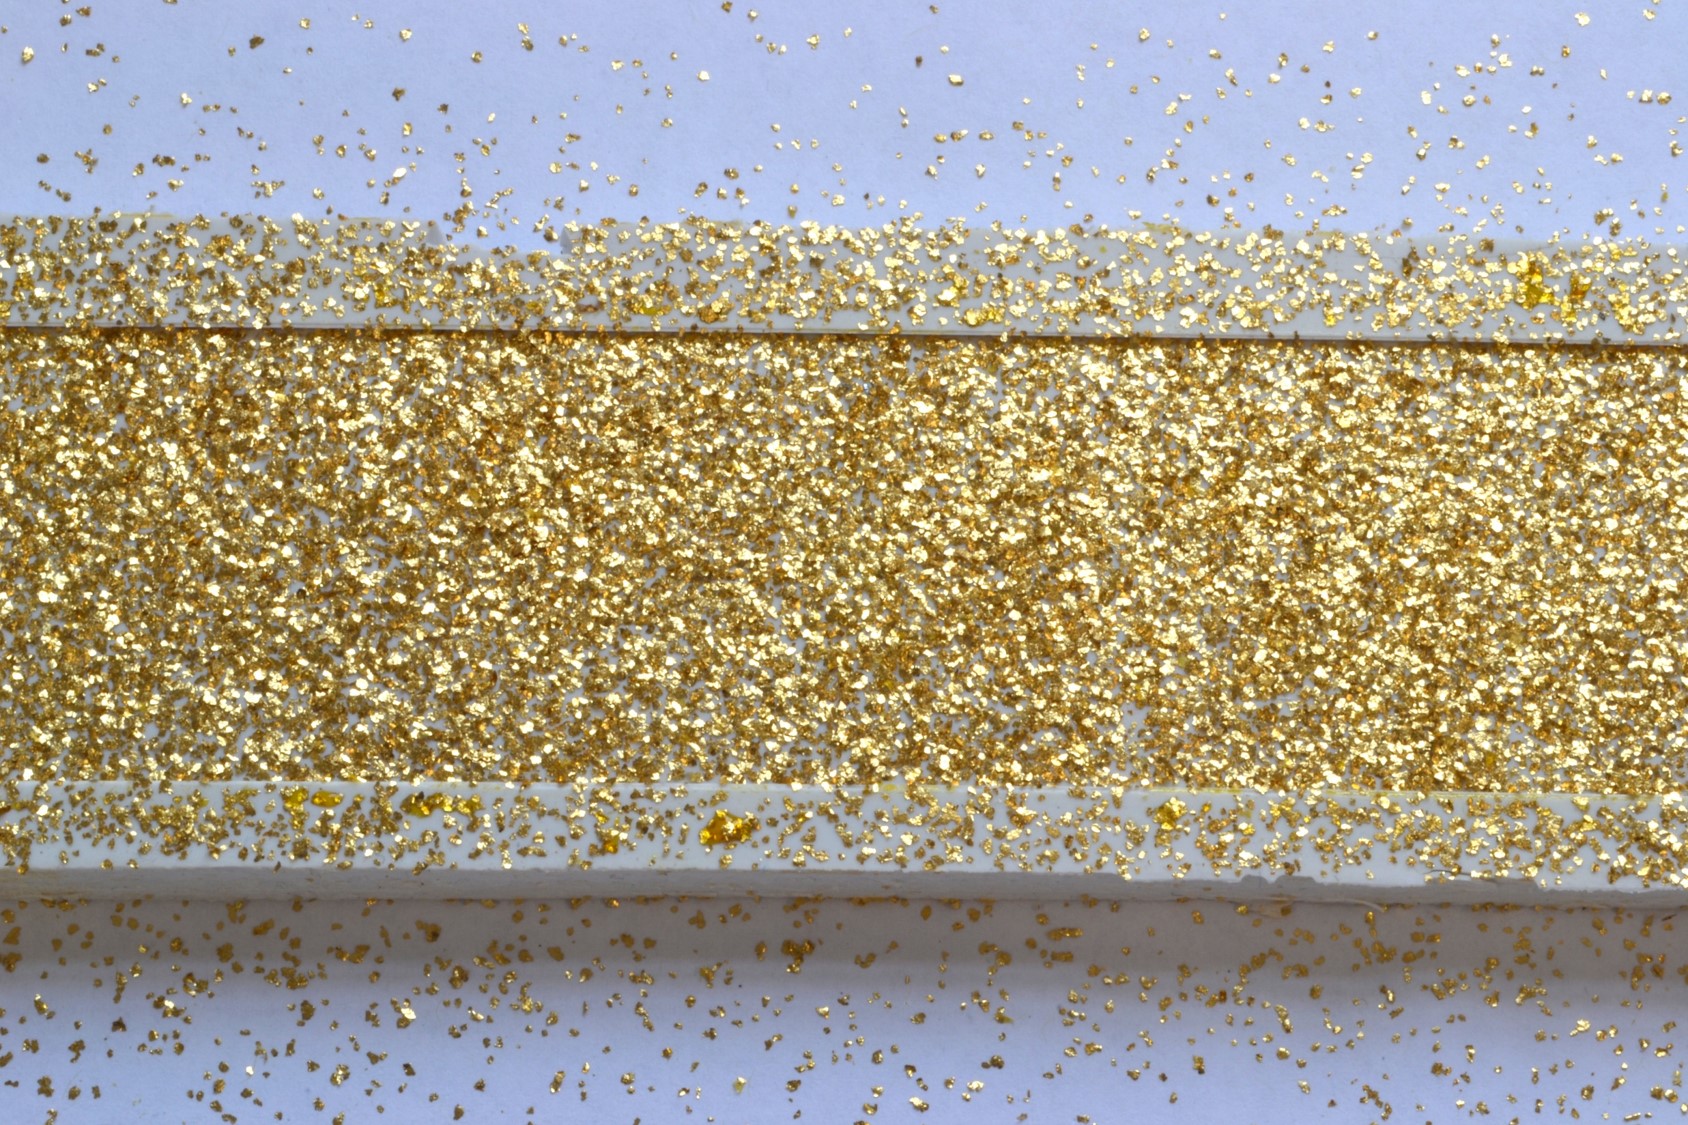
For a number of years the elaborate gold and blue japanned decoration on the V&A’s Dresden Cabinet had some very obvious areas of damage. Many of the surfaces are covered with aventurine, a decorative technique whereby flakes of metal glitter are embedded in resin to give a sparkling effect.
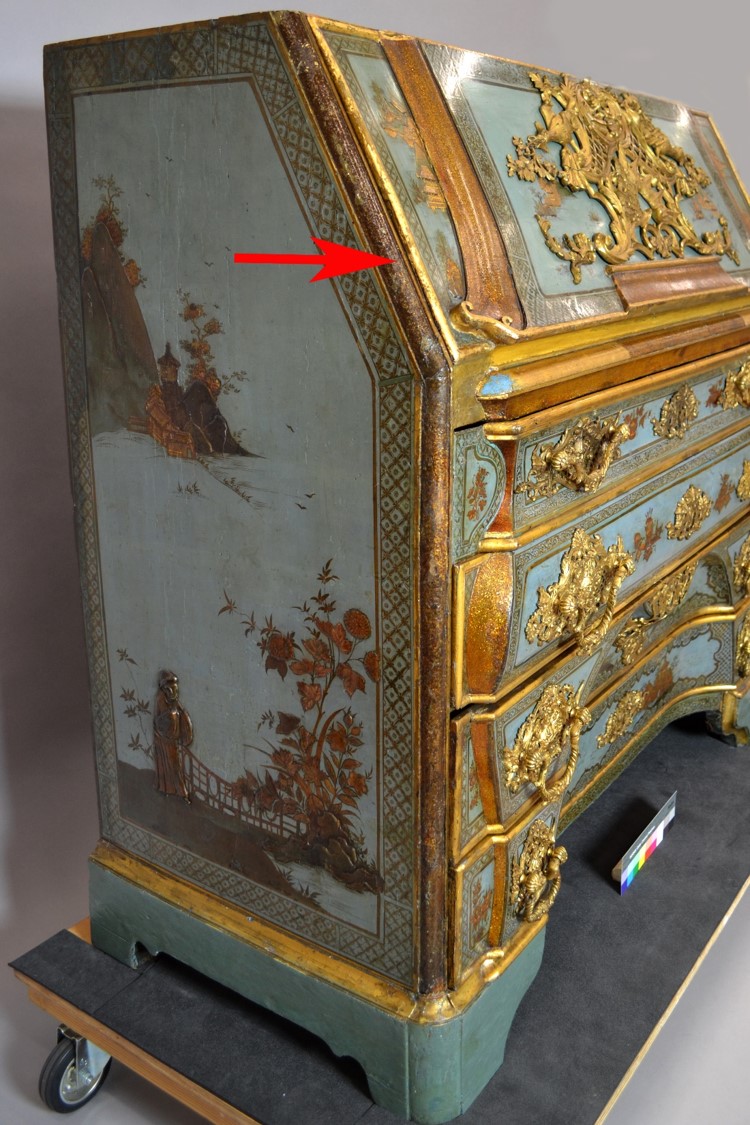
Long strips of aventurine on the bottom section of the cabinet had been damaged in the past and an old painted repair had turned them dark brown. During the extensive conservation treatment for the Europe Galleries it was decided to bring back the gold.
The cabinet was made around 1745, most likely for Heinrich, Count von Brühl (1700-1763), the Prime Minister of Saxony and chief advisor to Augustus III of Saxony. It is one of a group of four similarly japanned cabinets, all probably made for Brühl. Three of the four are extant: one is in the Museum für Kunsthandwerk (Dresden), the other in the Museum für Kunsthandwerk, (Frankfurt). The final cabinet is missing and was probably destroyed during the Second World War, but it may still turn up one day. The decoration is attributed to Christian Reinow, the court lacquer artist.
Japanning is a European decorative technique based on Asian lacquer and was popular in the eighteenth century. This writing cabinet incorporates chinoiserie designs: a European imitation and interpretation of the imagery and techniques used on Chinese and Japanese decorative objects. In Asia a specific lacquer is used (a tree sap known as urushi in Japan), but Western versions used various different natural resins to make the varnishes and paints.
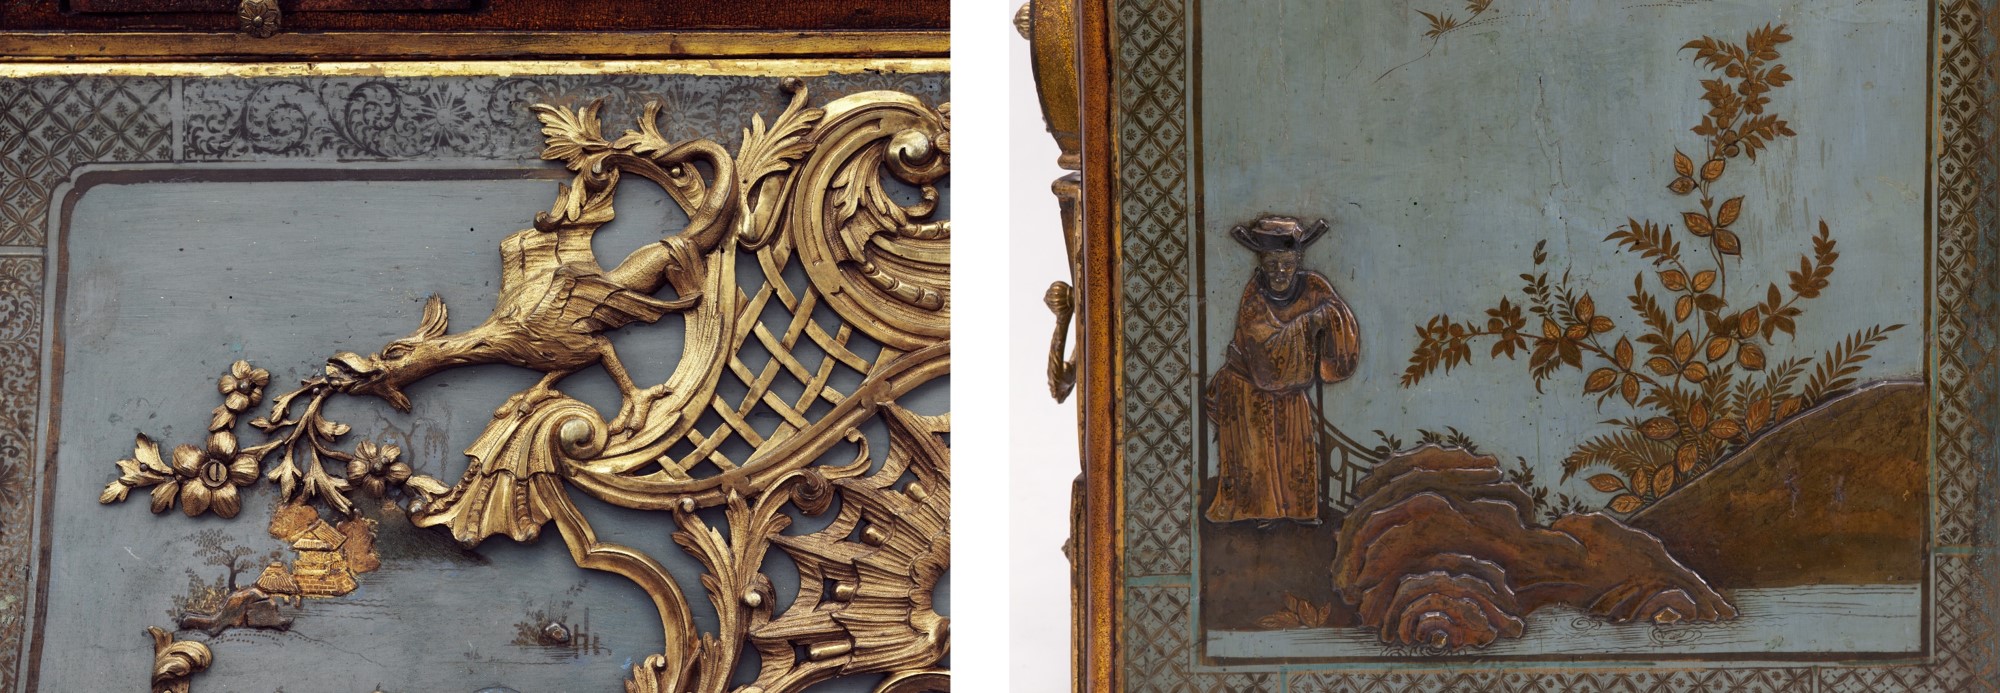
For the creation of the aventurine decoration, small metal flakes were made by chopping up bunches of silver-pated copper threads that had been flattened. Each flake was around 1 – 2 mm square. The surfaces to be decorated were built up with varnish and the flakes were then sprinkled on the still wet surface. Further layers of orange-coloured varnish would make the silver flakes appear golden. Aventurine is an imitation of a Japanese technique called nashiji which employs various sizes of gold or silver flakes, sprinkled on to wet urushi lacquer.

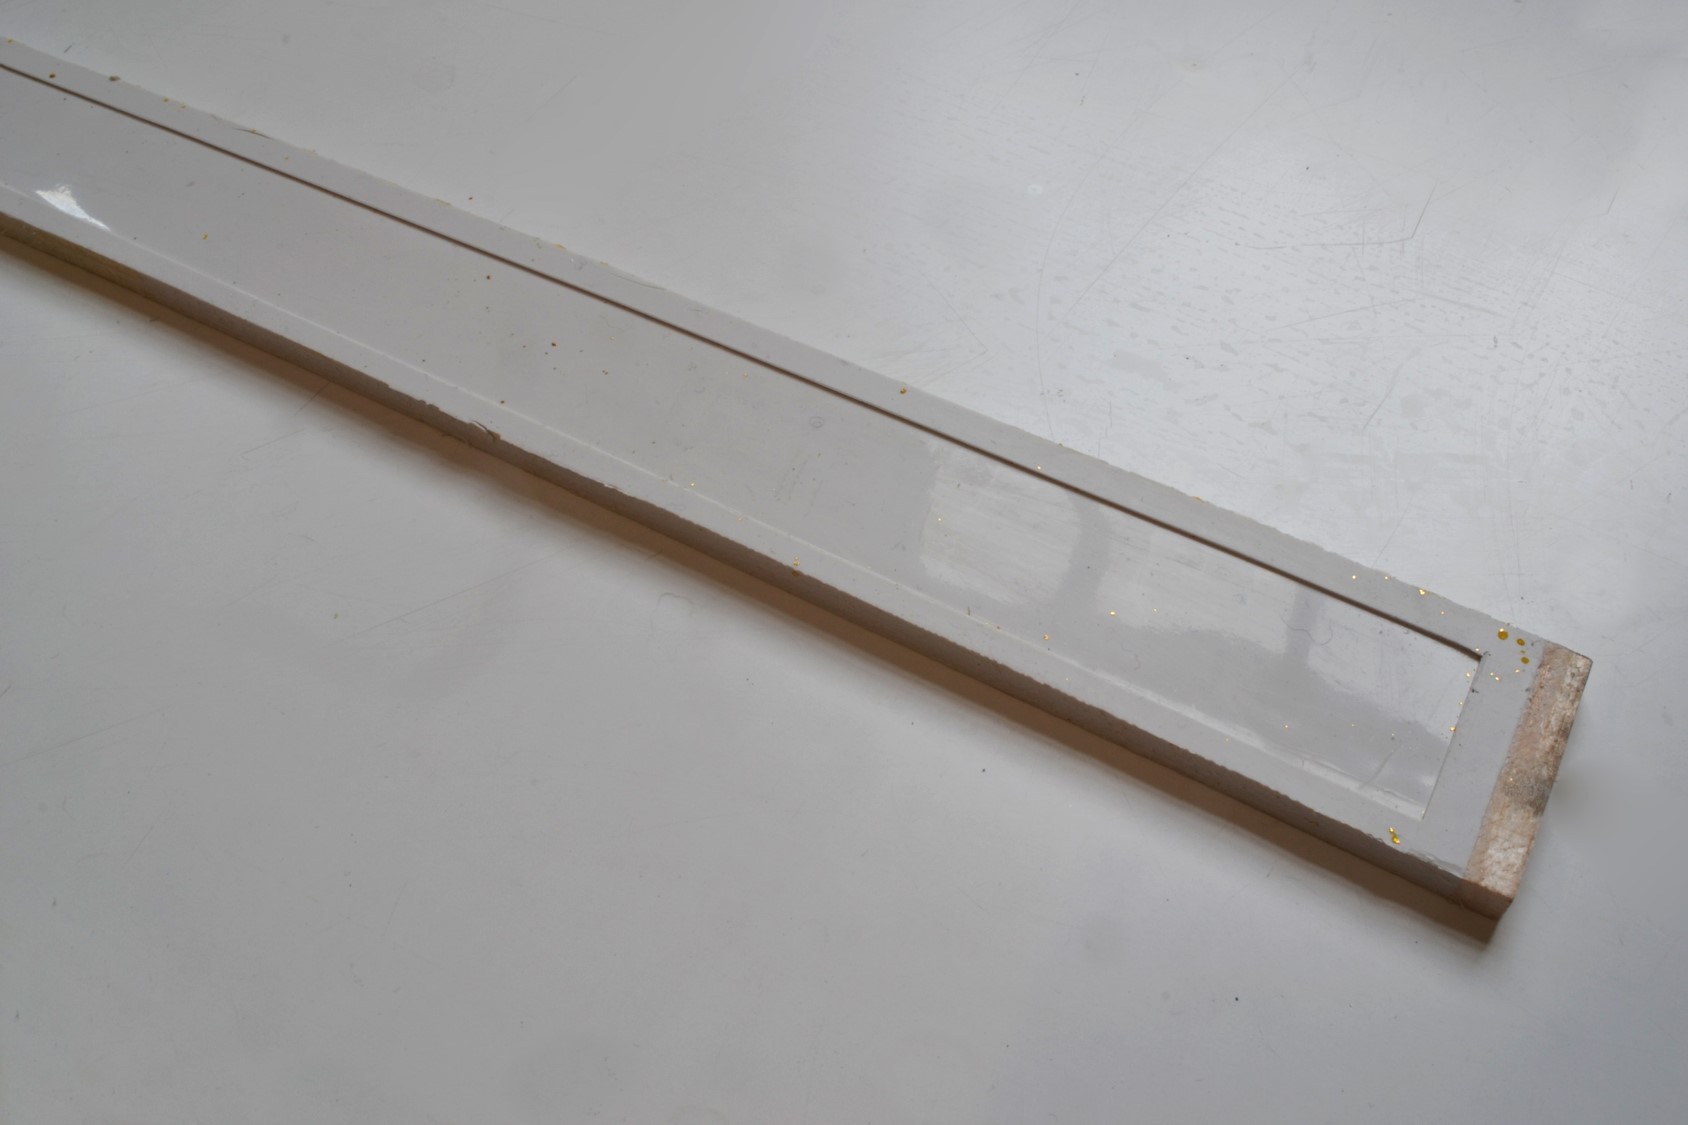
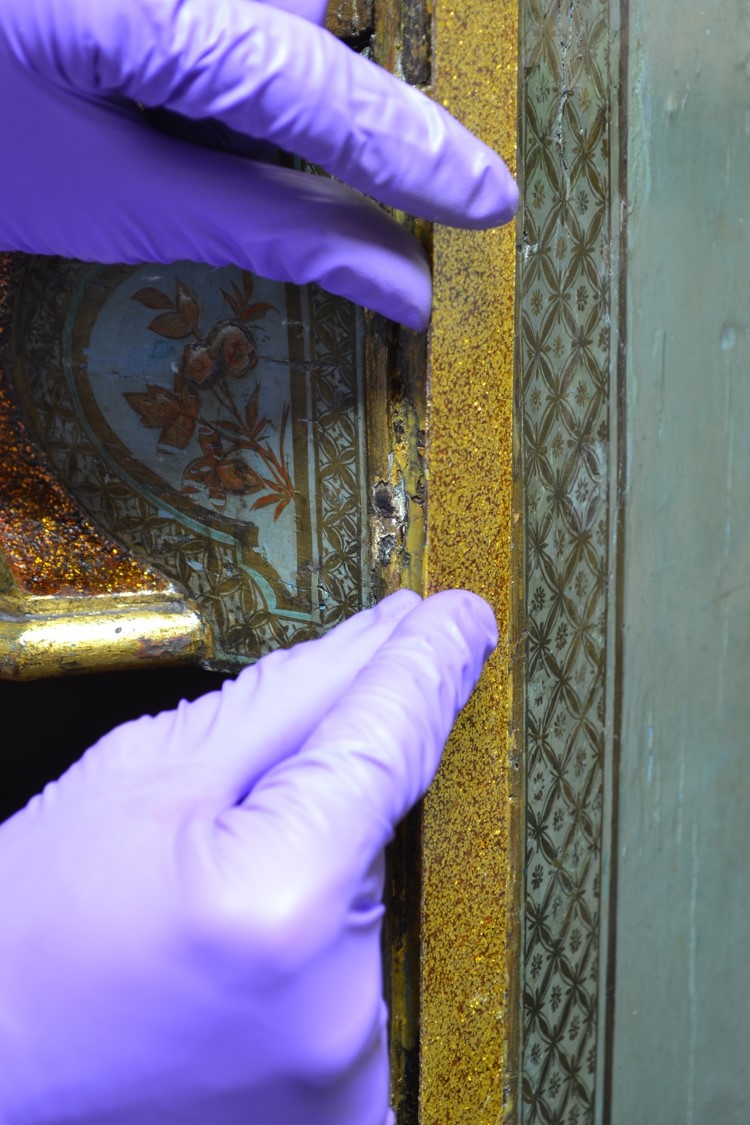
The front corners on the cabinet’s bottom section have quarter-round mouldings that had suffered extensive damage to the aventurine. So much so that in the past an attempt had been made to disguise the losses by painting the whole section with a thick gold varnish. This inappropriate treatment had turned dark brown over time and had become very hard to remove.

We did not know how much of the original decoration had survived under this brown layer, but some initial tests suggested that very little had survived. With this, and the difficulty in removing the brown layer we decided to re-create the aventurine on top. One of the key conservation tenets is that interventions should be identifiable and ideally constructed so that a future conservator could remove them without damaging the object. A technique was developed that involved casting a film of glittery epoxy resin with embedded gold flakes, and then adhering it to the areas of loss.
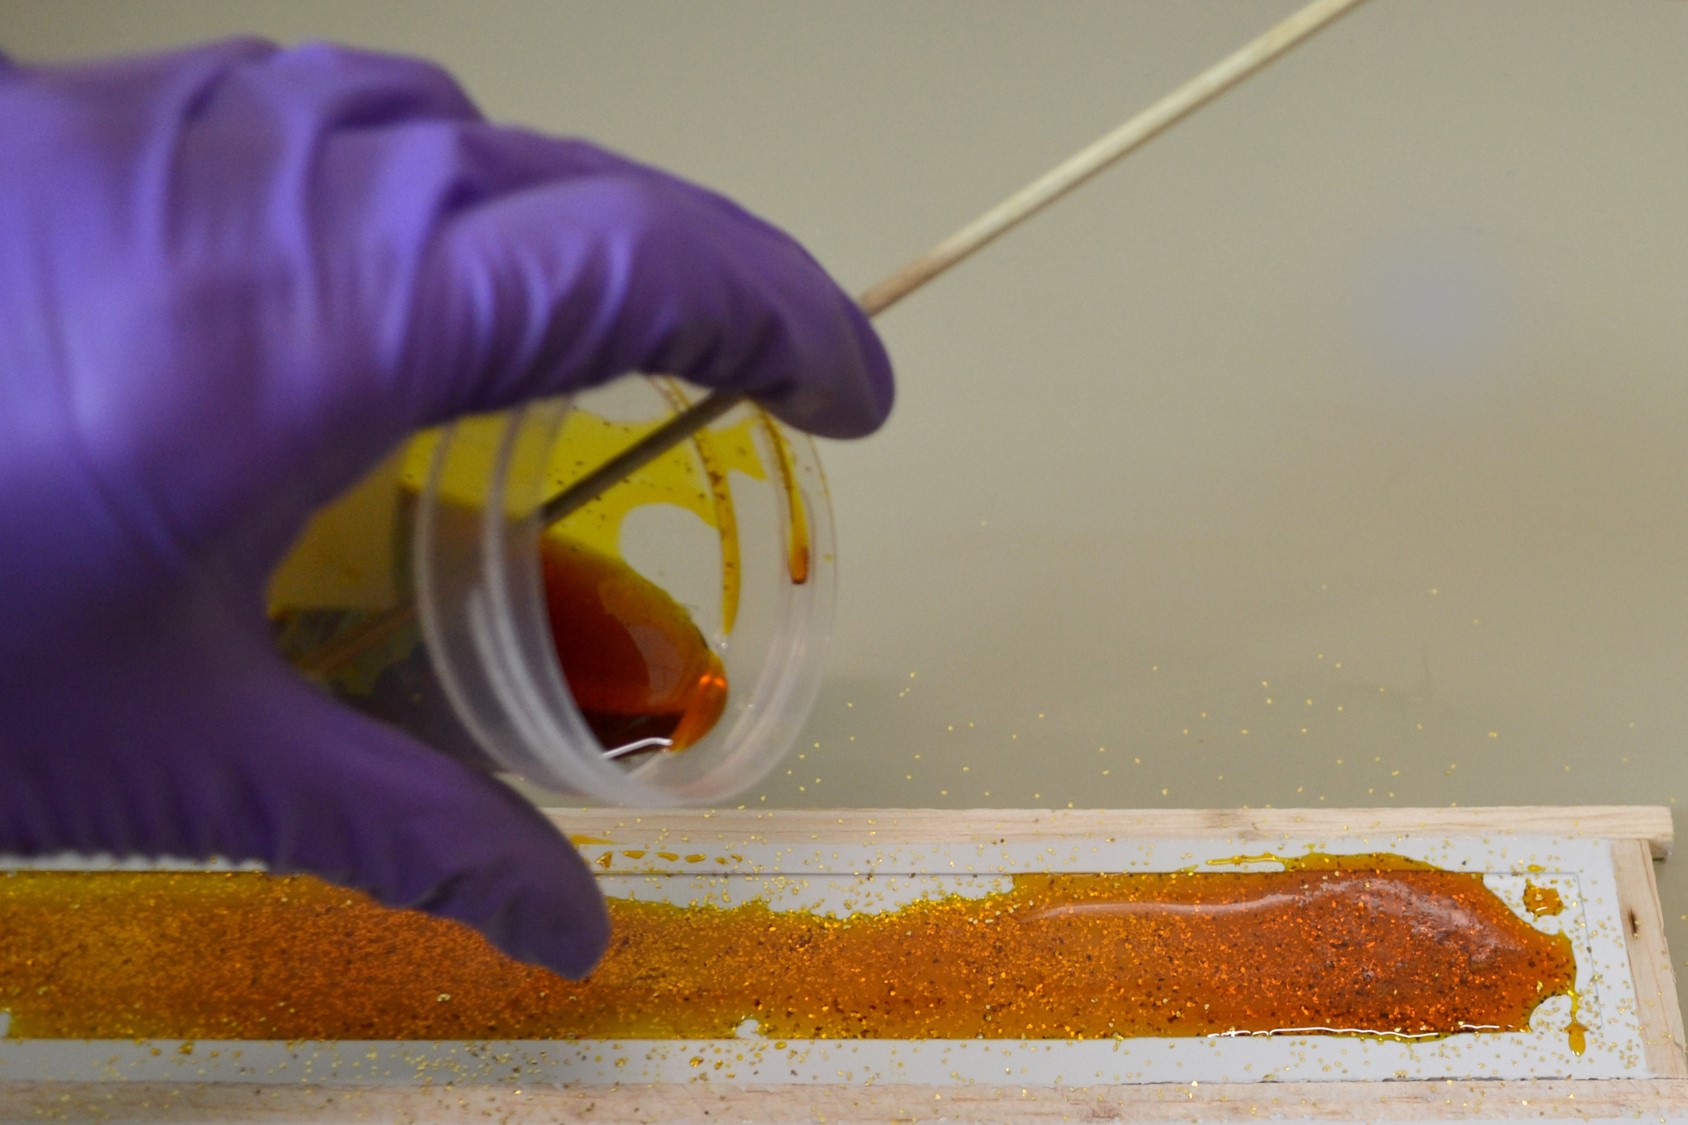
First I made a silicone rubber mould which had an impression that was 1mm deep and that had slightly larger length and width than the area to be replaced.
Japanese gold nashiji flakes were then sprinkled evenly in the impression.

I chose an epoxy resin (Fynebond®), that had good long-term ageing characteristics and that wouldn’t yellow significantly over time. It was coloured using light-stable Orasol® dyes. This was then poured on top of the sprinkled gold.
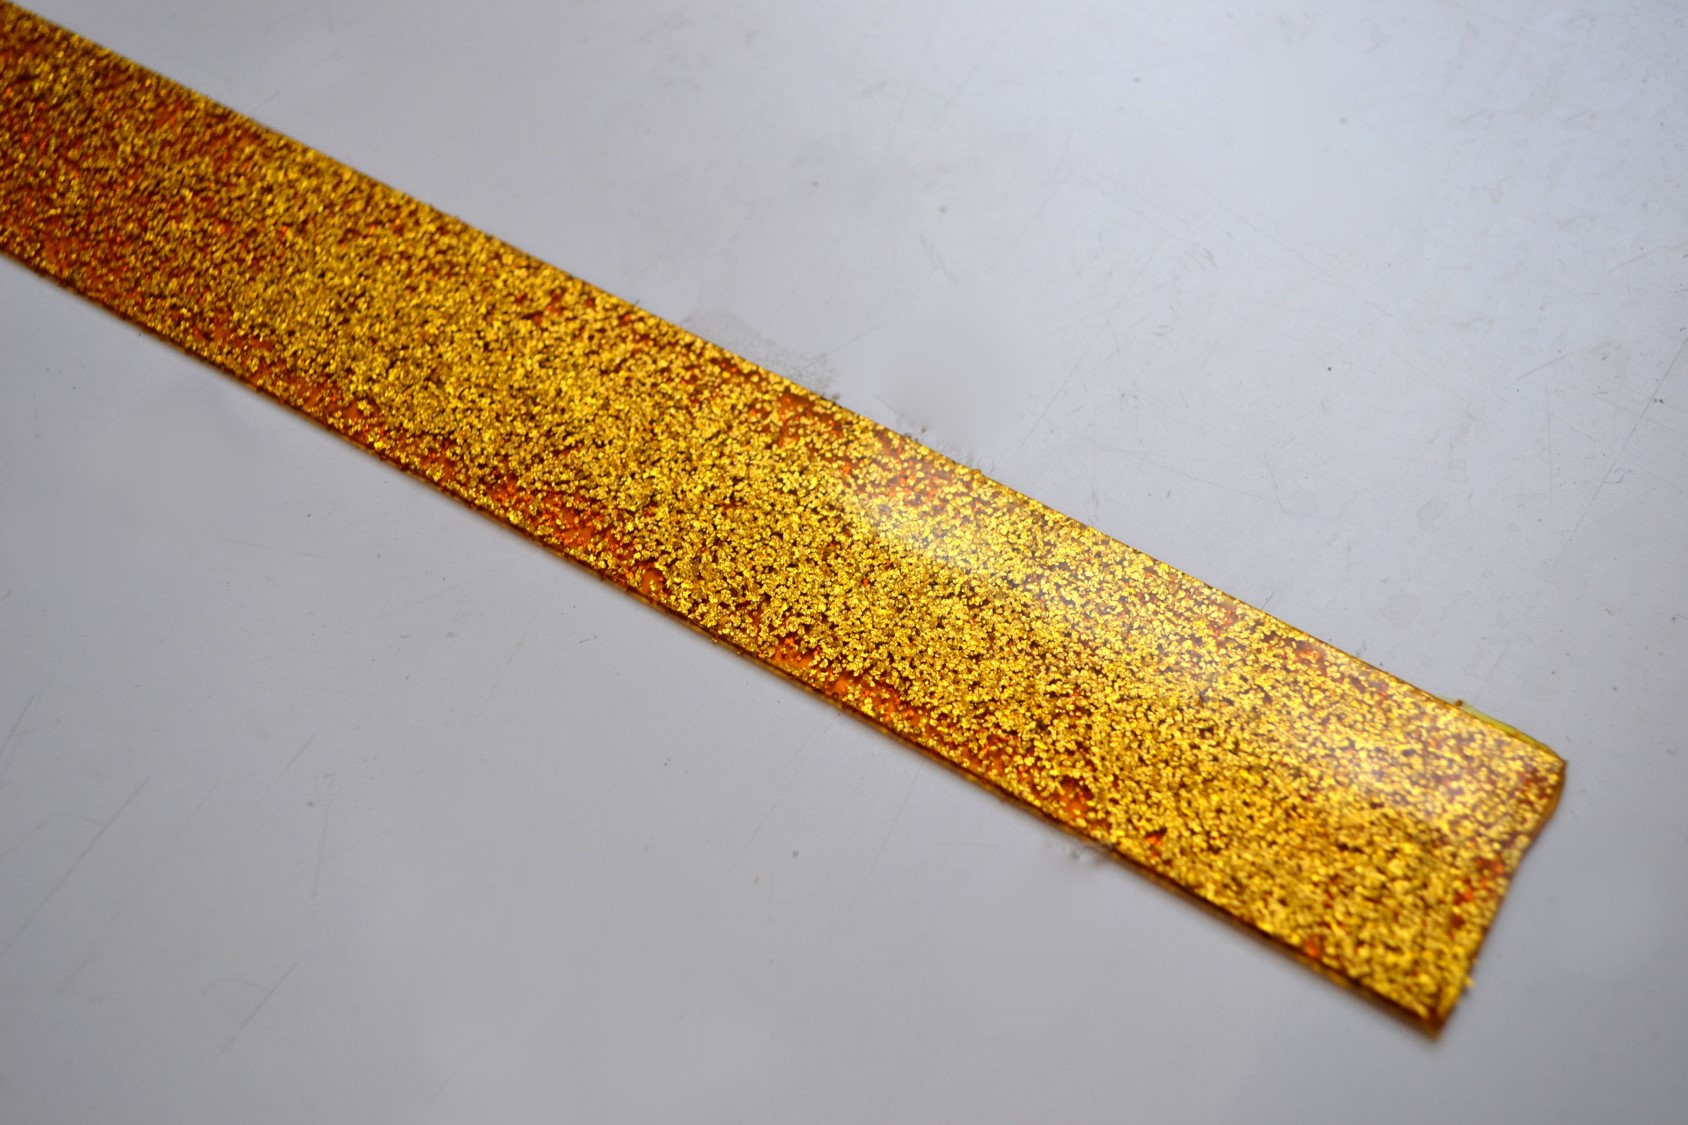
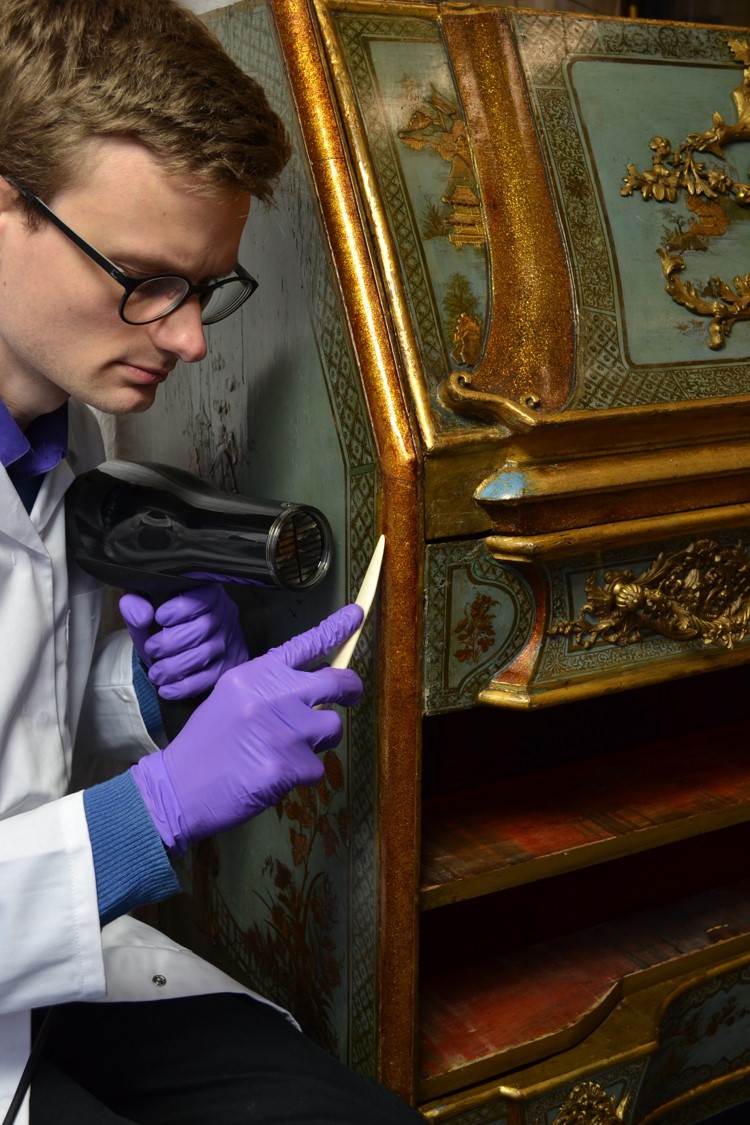
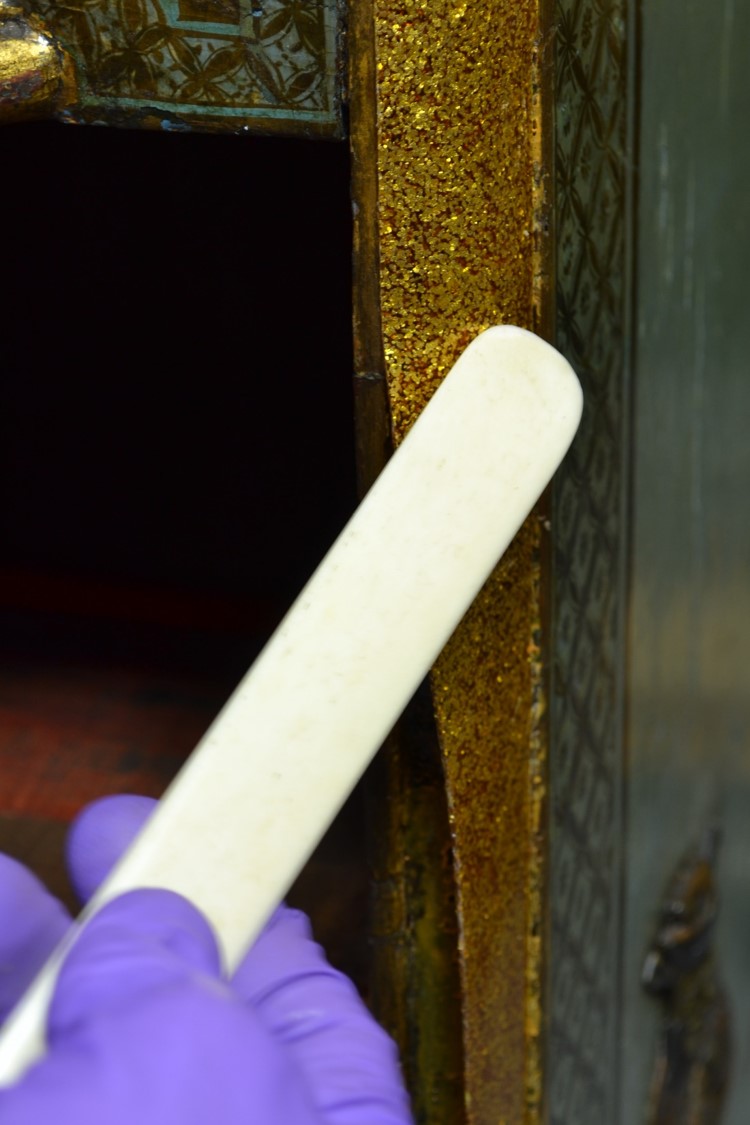
Once cured, the film was cut to the correct size and fitted in place. In order to make the film flexible enough to curve around the quarter-round moulding it had to be warmed up slightly using a hairdryer. I chose a polyvinyl acetate adhesive (Mowilith 50®) that could be applied, and if necessary removed, without damaging the object. This was important as some adhesives could dissolve or damage the underlying surface and be impossible to remove in the future.
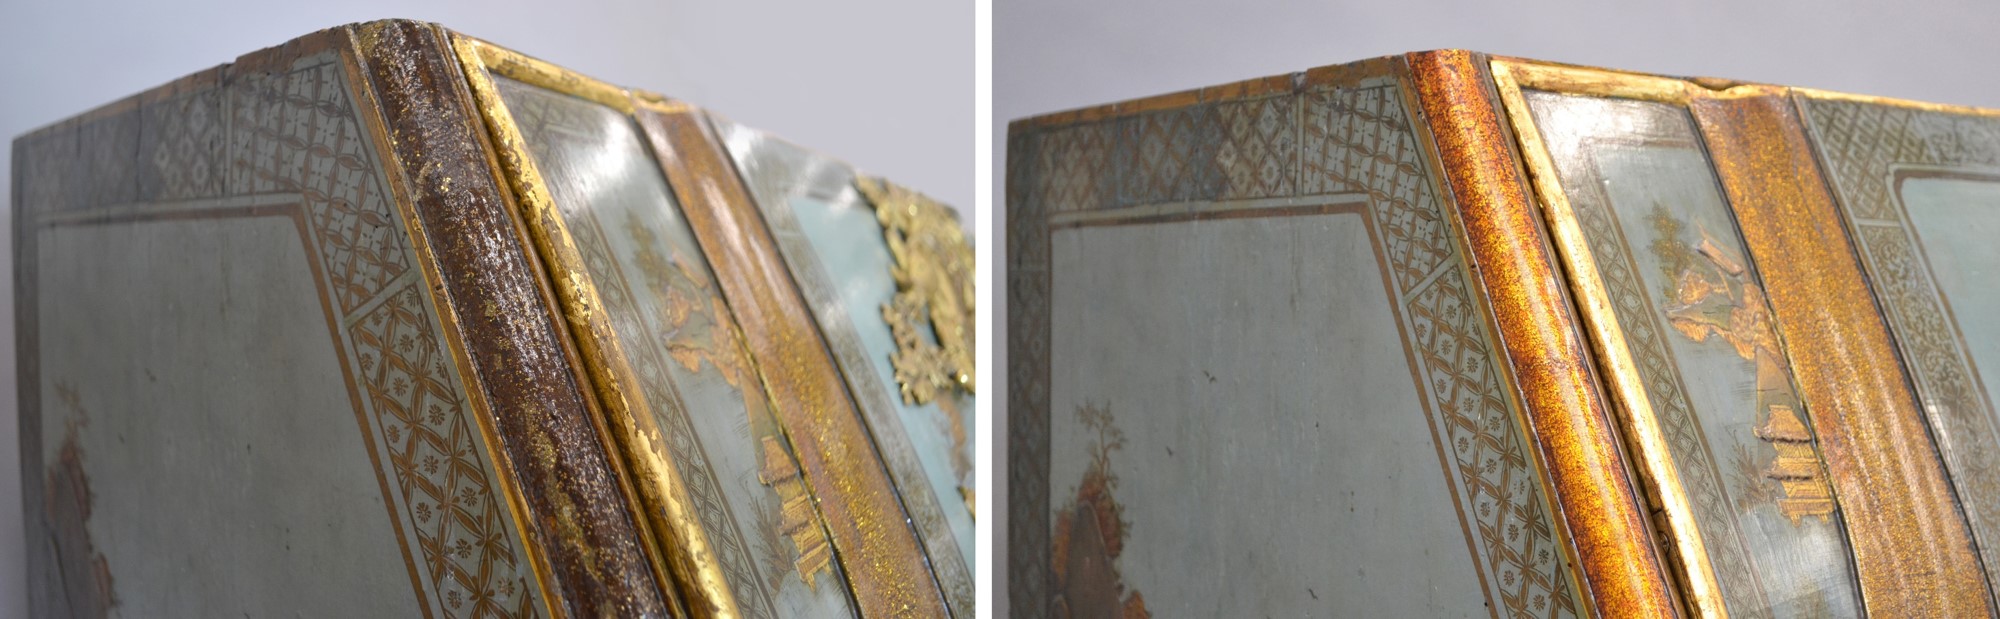

The epoxy film had many advantages, it had good working properties and could be easily distinguished as a replacement if viewed under UV light. The cabinet is now ready to show off its new sparkles in the Fantasies display of the new Europe Galleries.
Acknowledgements:
Many thanks to Andy Thackray for his help in developing the idea
Wonderful effect from glue and glitter.